Live streaming video games has become big business over the last few years, with the pseudo-celebrity likes of PewDiePie and Ninja attracting millions of followers to their Twitch channels and raking in serious bucks as a result. Ironically, although finding that level of success is obviously the exception rather than the rule, the one thing that absolutely won’t be a hindrance to any aspiring Tfue or xQc is the gear required to set up a streaming rig on par with those of the top tier. Yes, as with most things in contemporary digital media, the barrier to entry for game streaming is surprisingly low, and in this guide, we’ll tell you exactly what you need to get up and running.

Written by EVO
Before we start, we should make it clear that we’re only discussing PC and Mac here, as the two most popular consoles for streaming – Xbox and PlayStation 4/5 – make the process almost effortless: plug in your headset and webcam, hit the Stream button and do your thing. Streaming from PC or Mac requires a little more setup, but also gives you many more options in terms of video and audio quality.
Assuming you’re already equipped with a suitably capable PC or Mac, a decent broadband connection and a Twitch account, then, let’s start with the visuals…
Camera
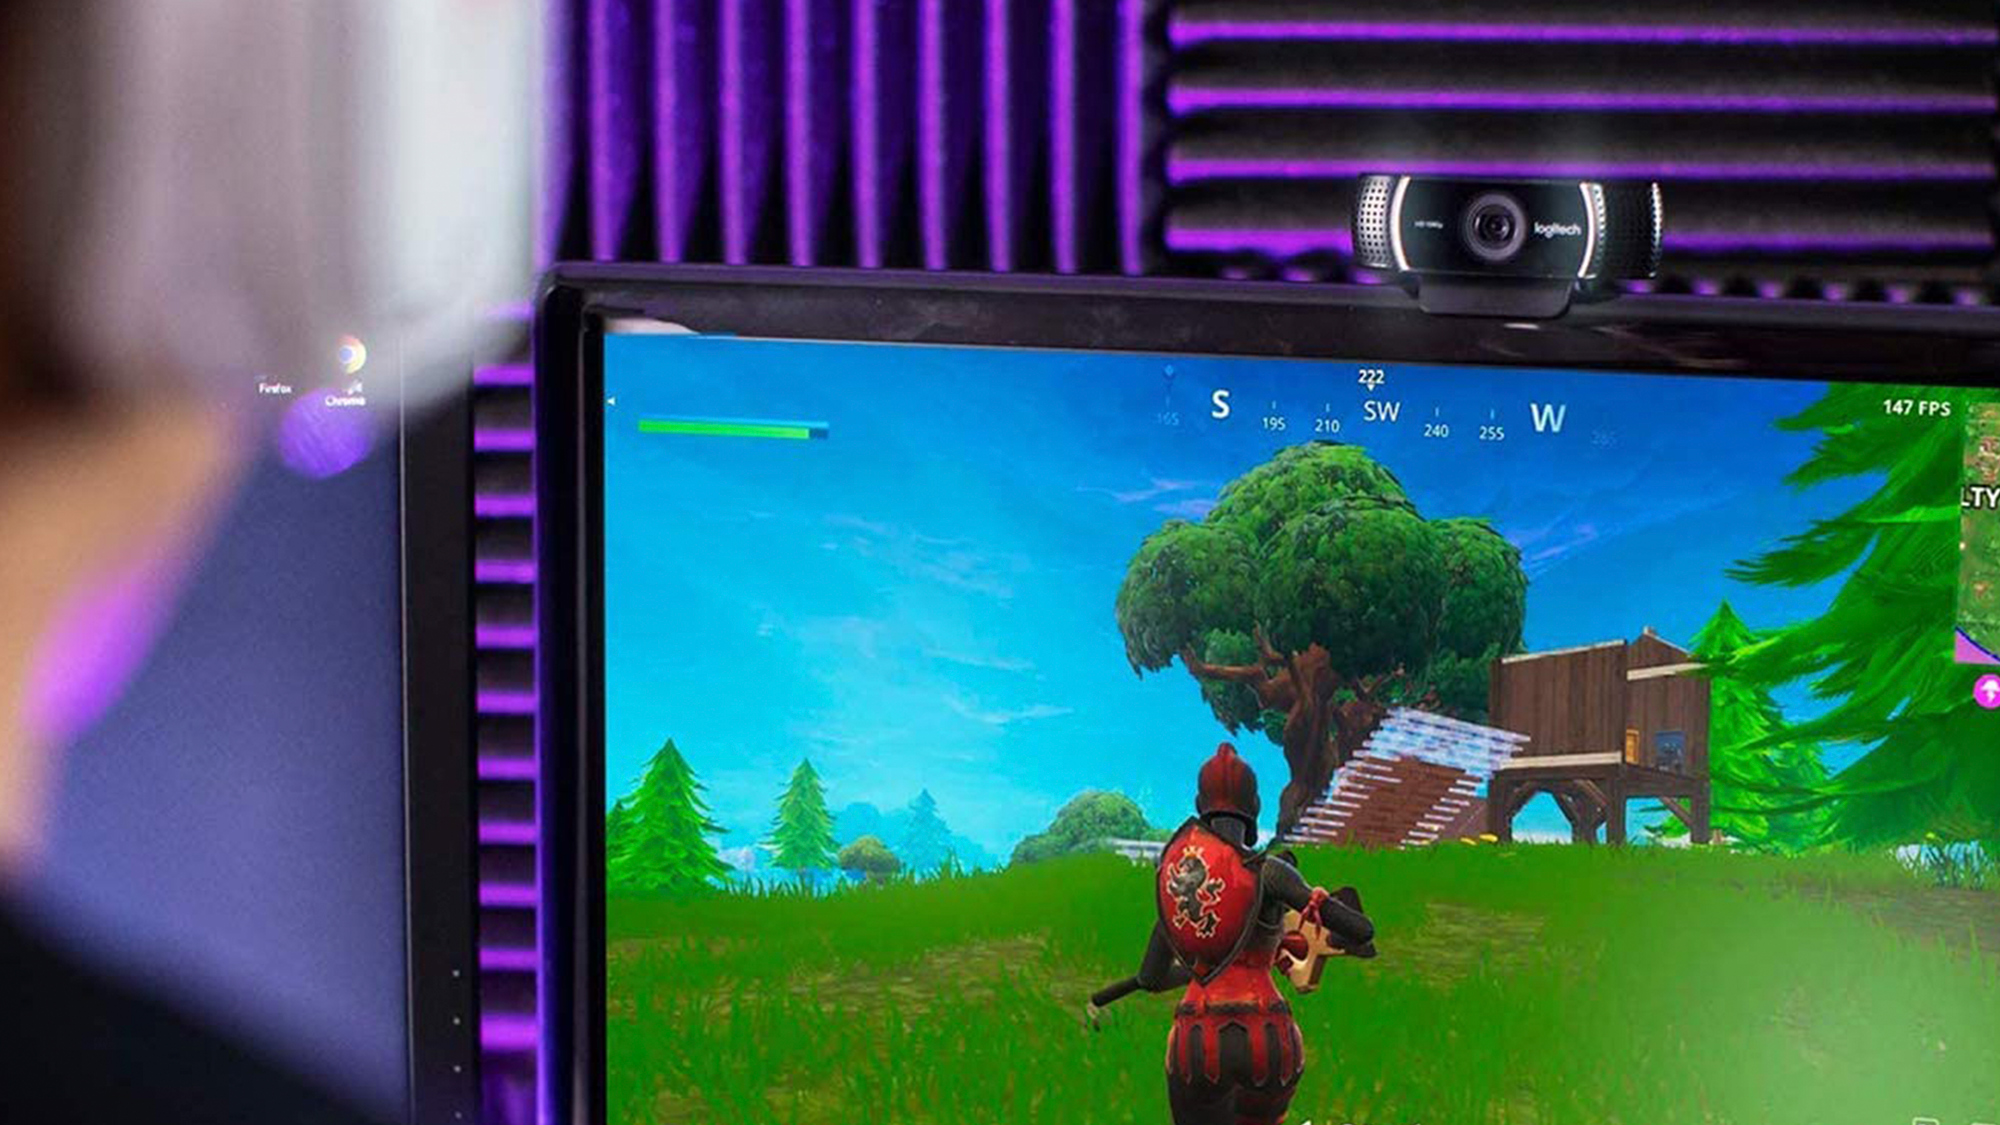
While the quality of the screen capture in your stream is easily optimised, the clarity of the parallel live camera feed that puts your mug in the corner will be entirely down to the camera you choose to invest in (or the one built into your laptop if that’s what you’re happy to stick with). Thankfully, there are numerous sub-£100 1080p options on the market that will more than suffice, including the ubiquitous Logitech C922 HD Pro and Elgato Facecam. If you’re a stickler for image quality, though, doubling that budget will get you into 4K territory; and if you’re really serious and money is no object, you might want to step into the world of DSLR cameras and capture cards, which is beyond the scope of this guide.
Lighting
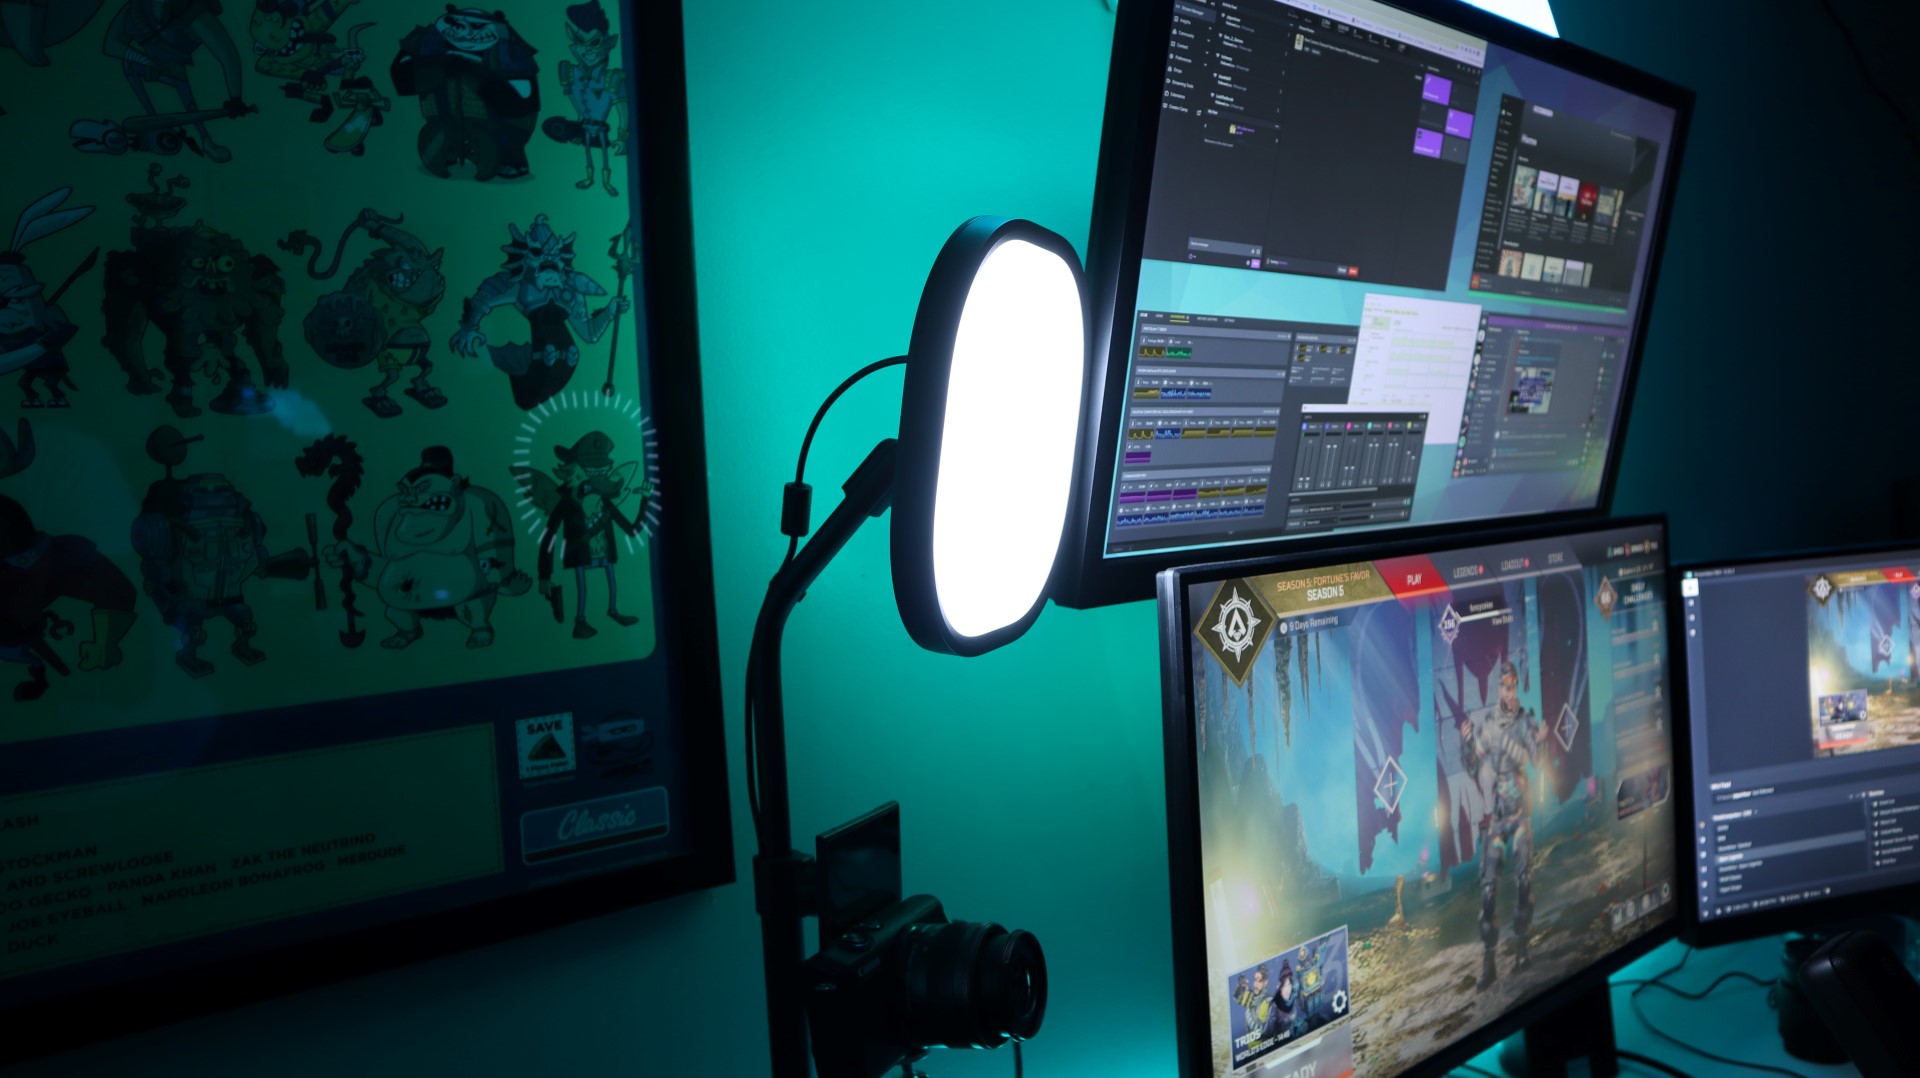
While you can certainly get away with a carefully positioned desk lamp for basic scene illumination, dropping a bit of cash on some dedicated lighting – the Elgato Key Light, Lume Cube Broadcast Lighting Kit or just about any budget softbox kit, to name a few – will make a massive difference to your perceived production values.
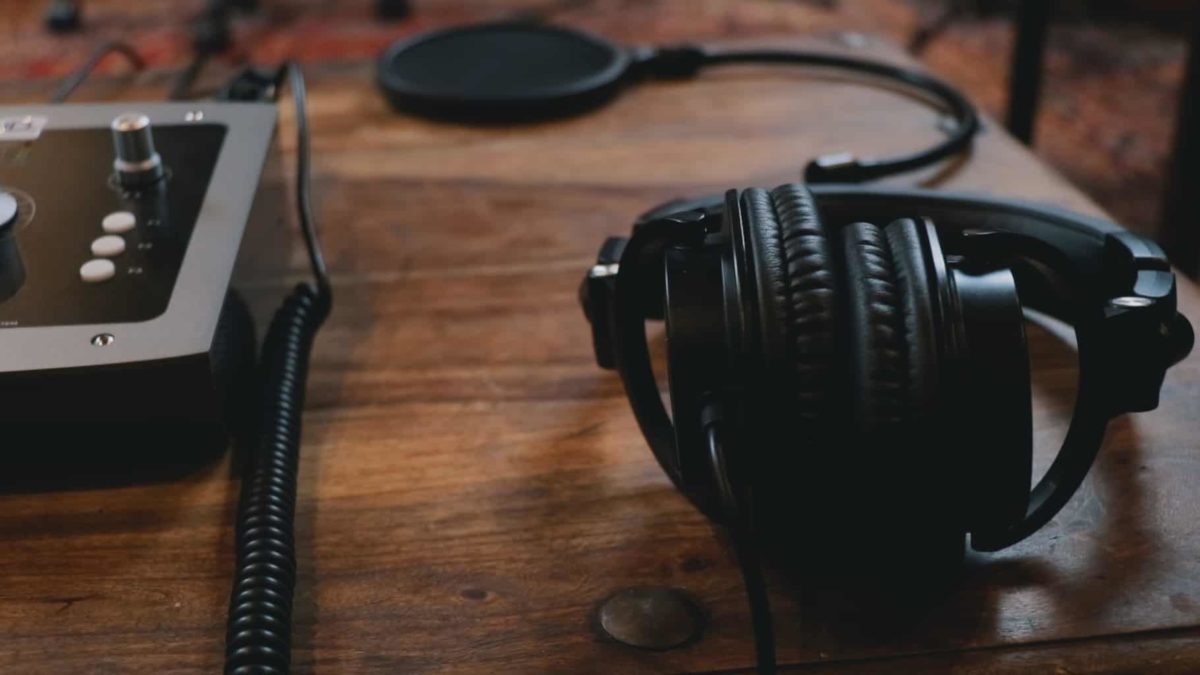
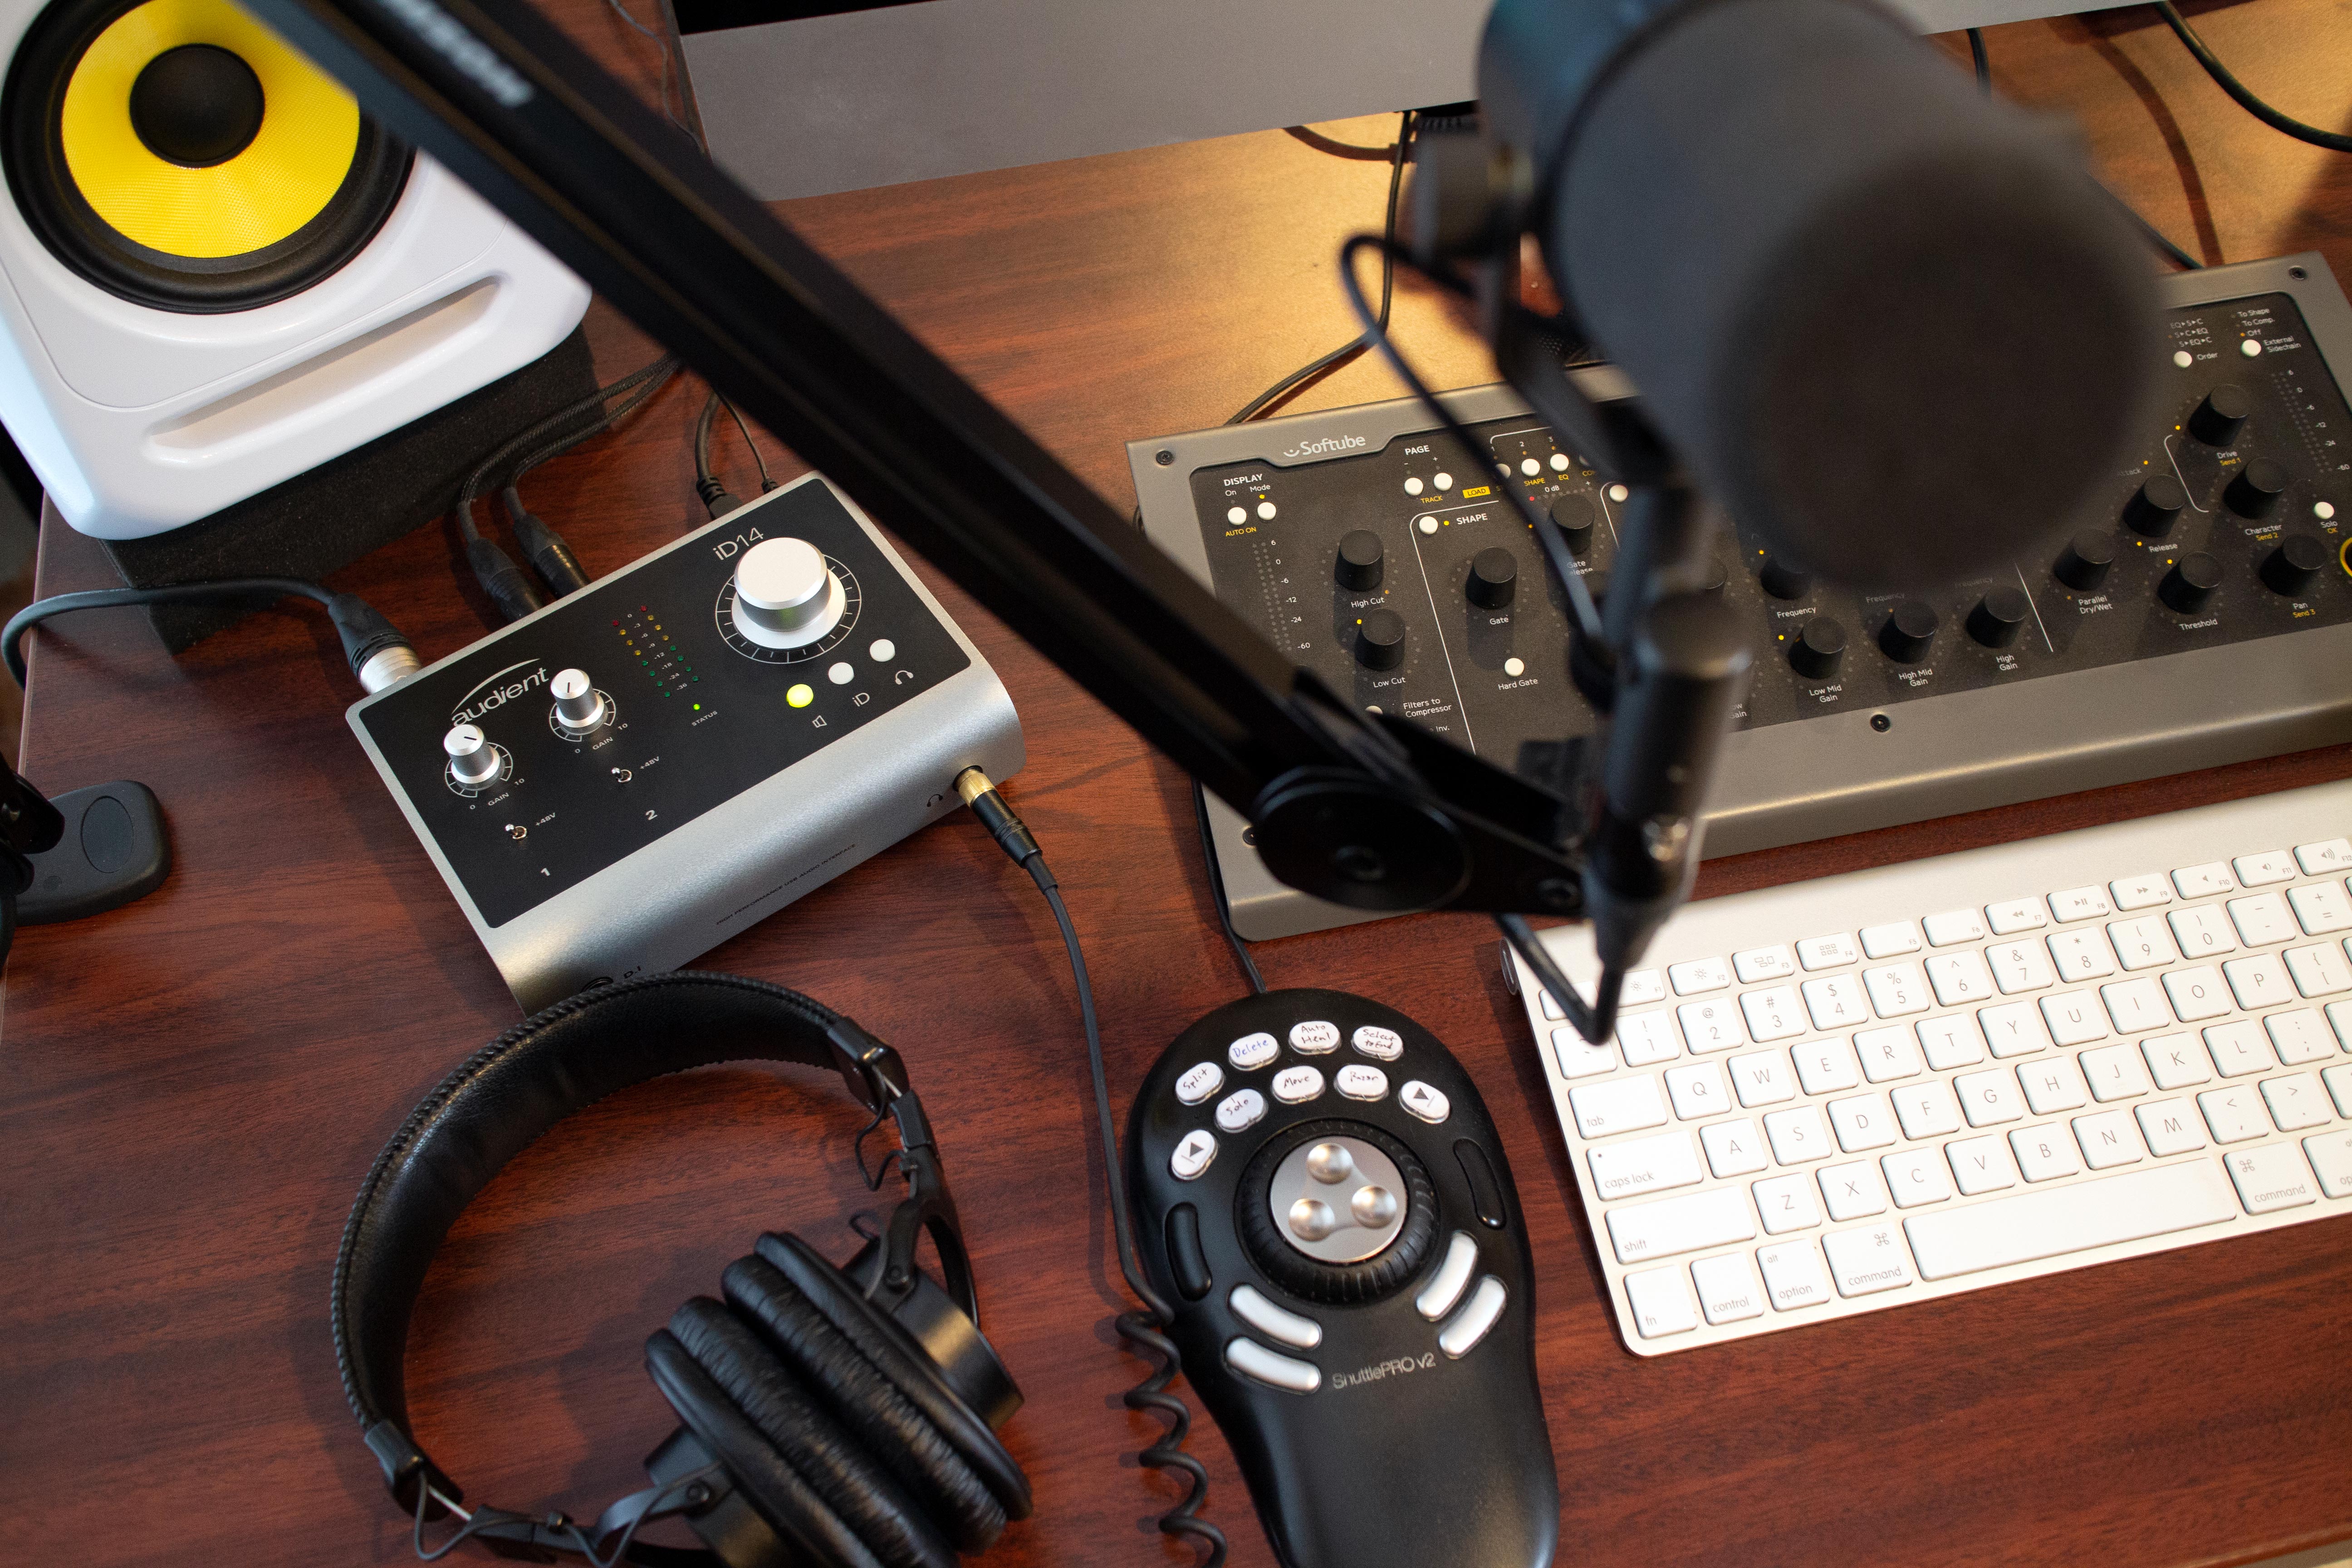
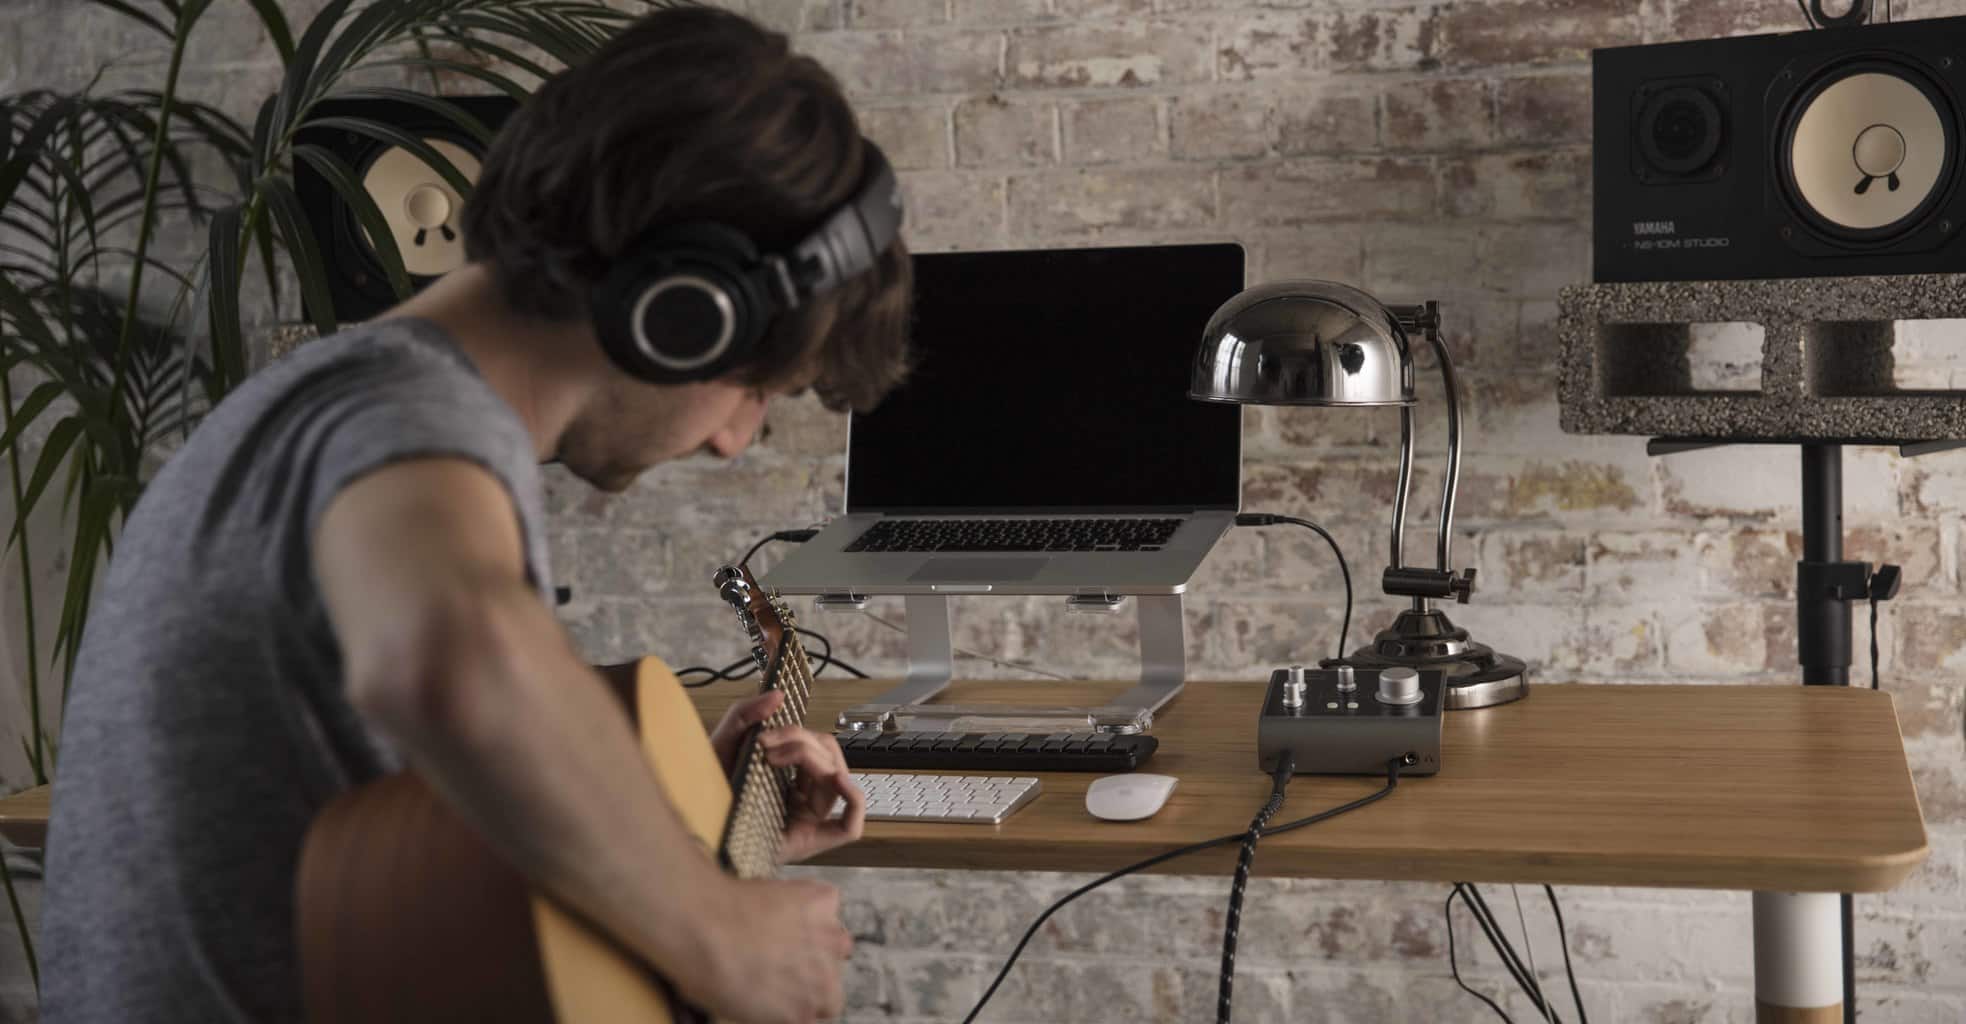
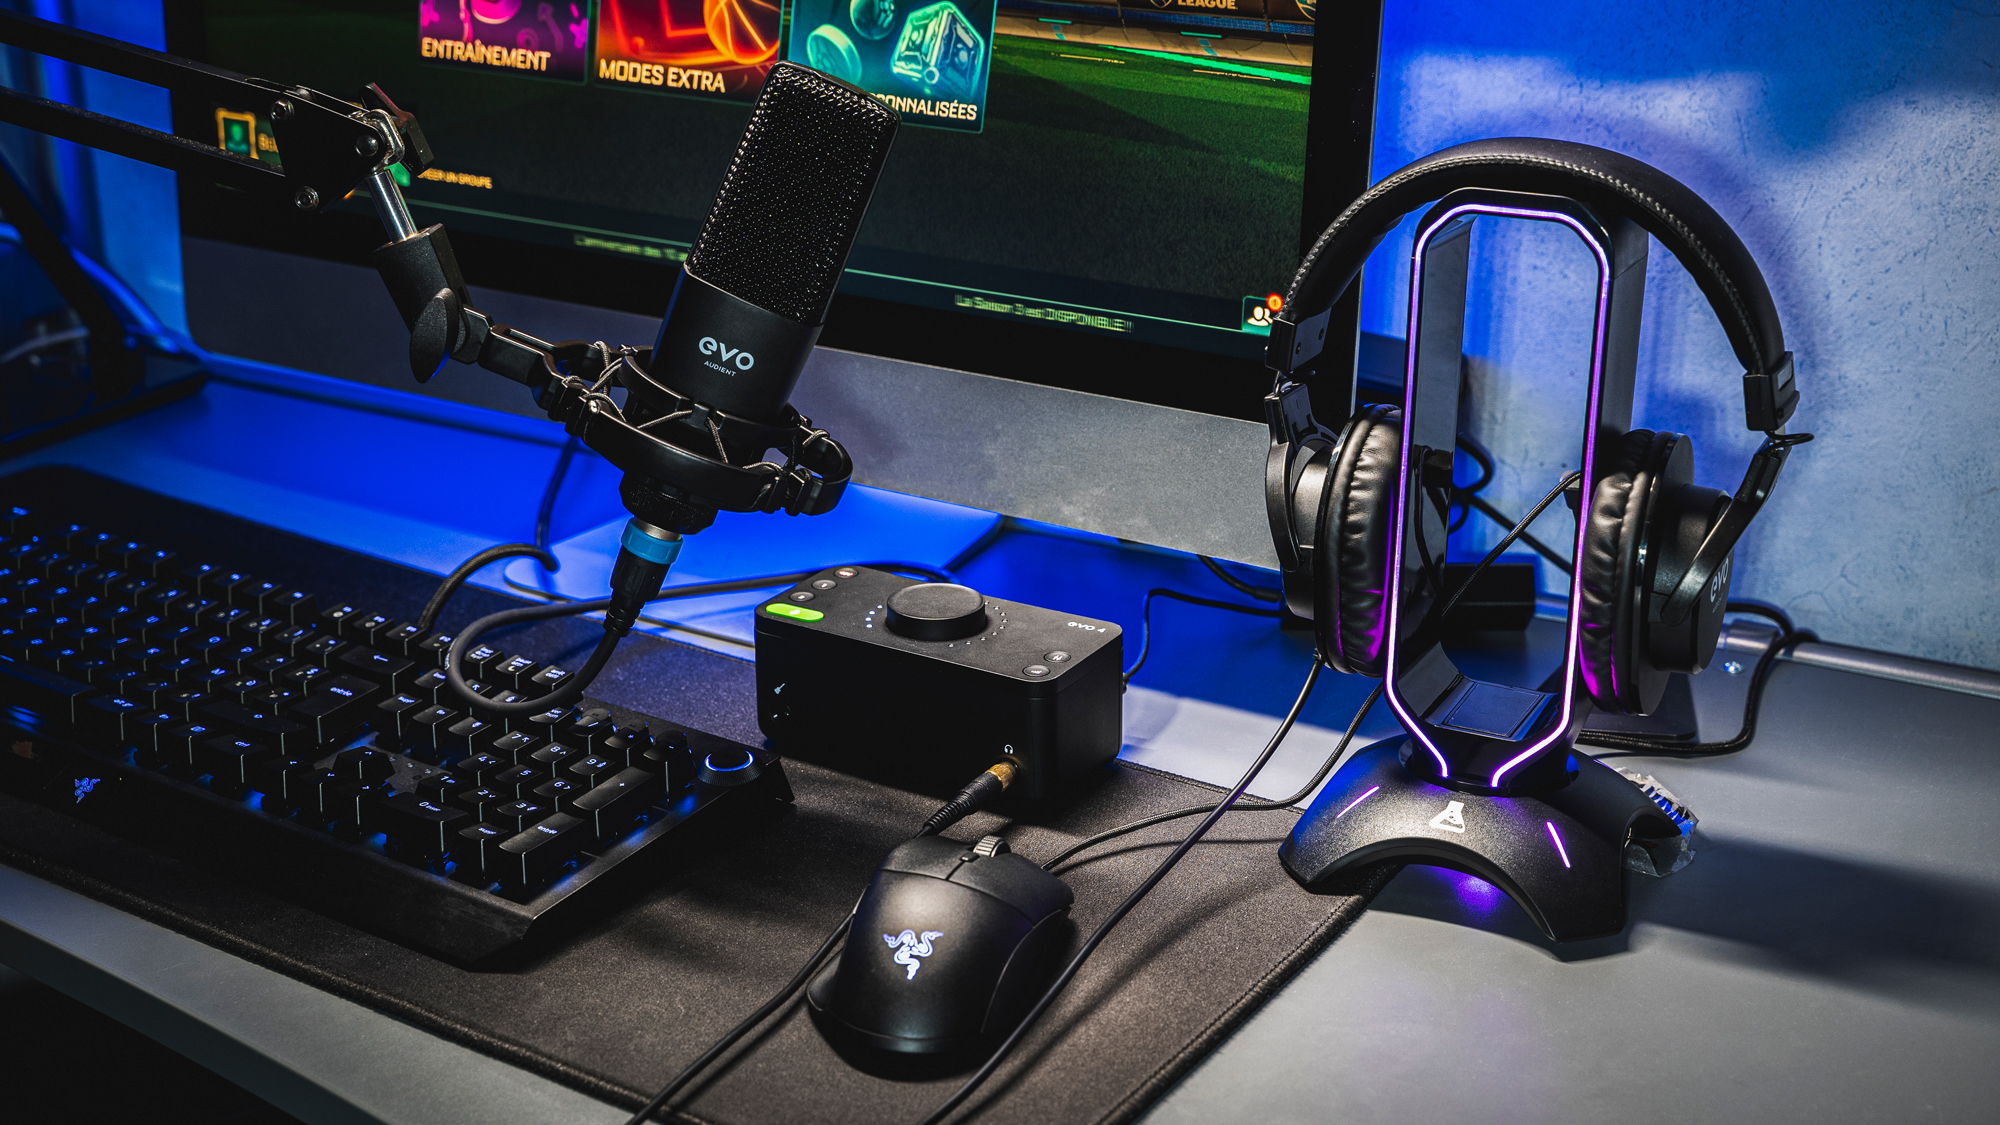
Audio interface
One of the technical elements that separates a good stream from a great one is the method by which the streamer captures their own voice. Don’t get us wrong, an integrated headset mic will sound fine – but a pro-quality microphone plugged into a pro-quality audio interface will make for a night-and-day improvement over that most rudimentary solution.
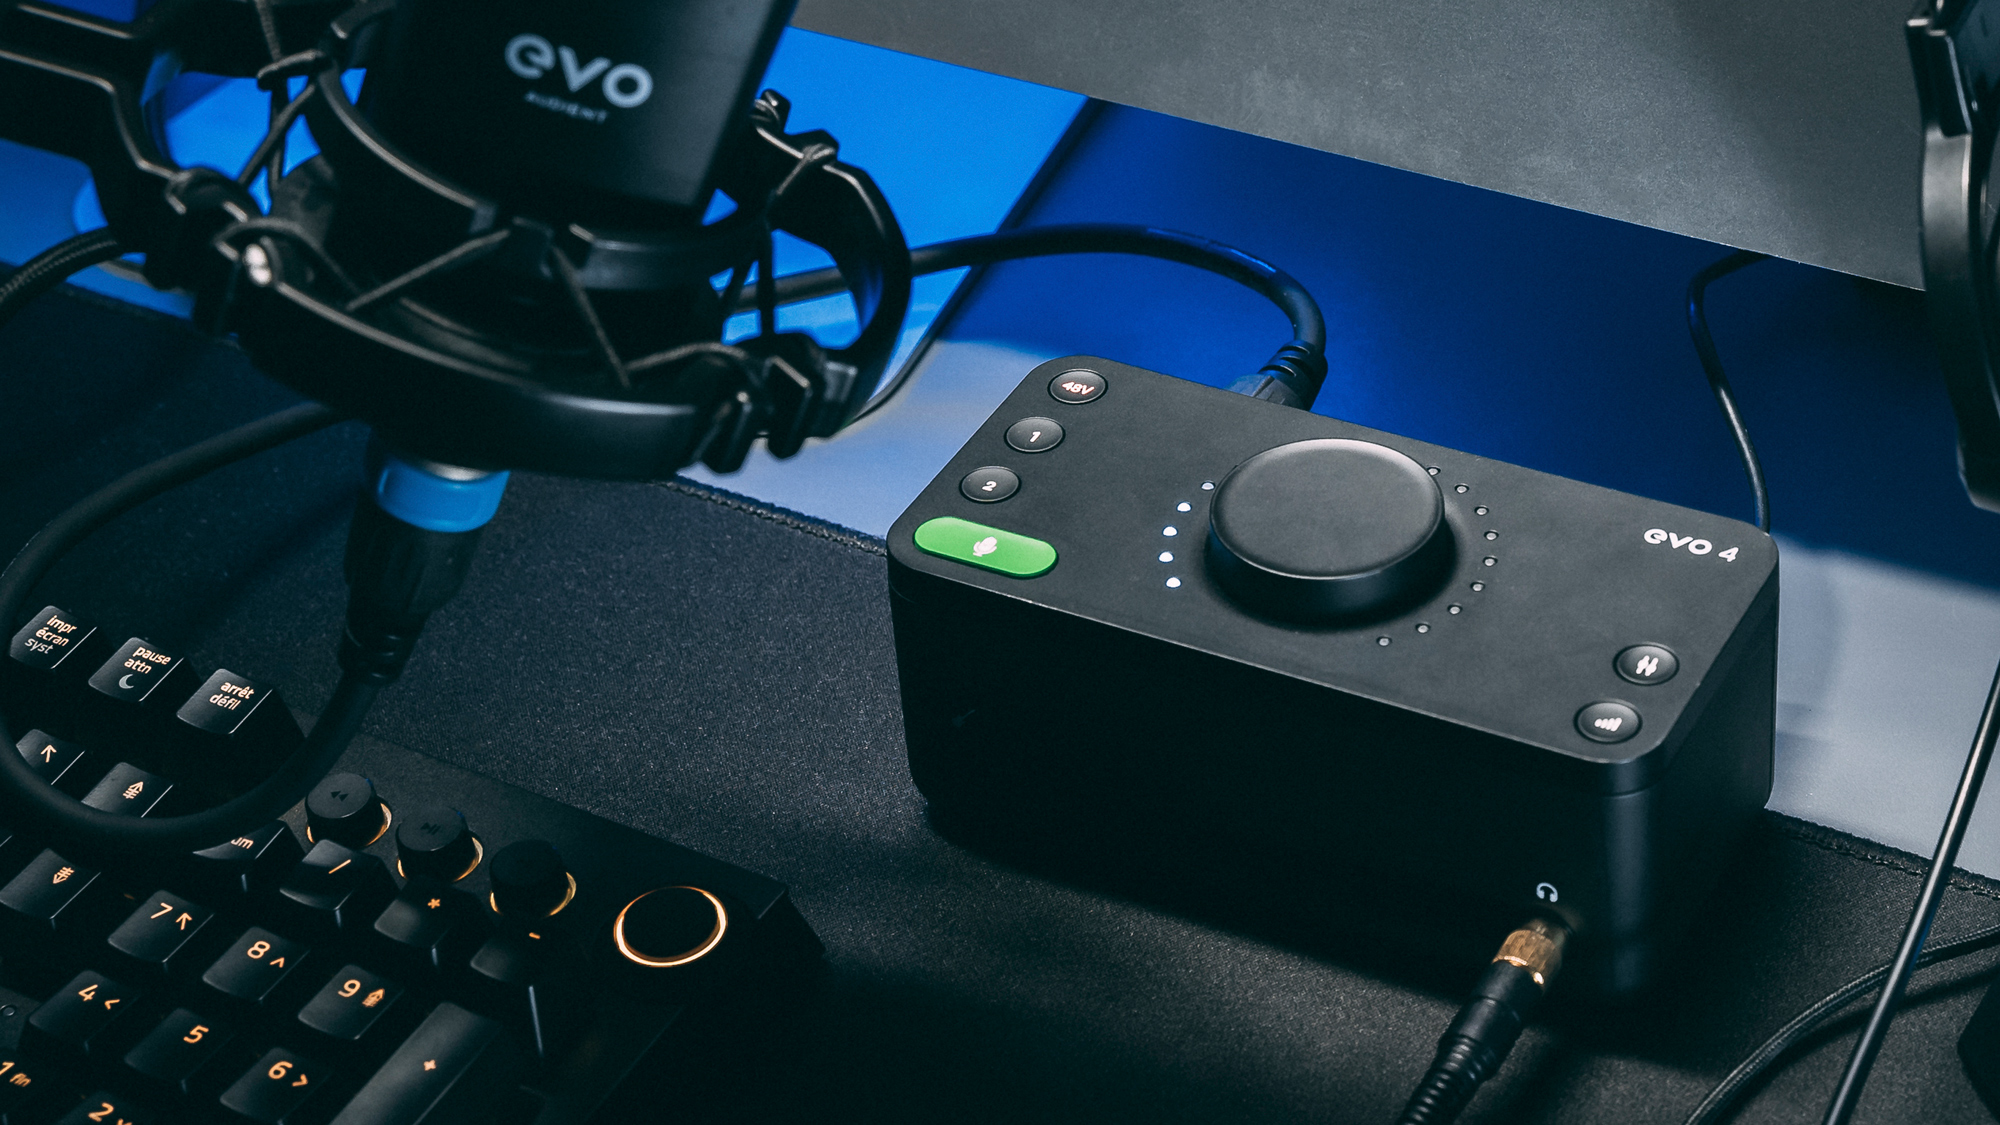
The EVO 4 interface is ideal for game streaming, and represents truly unbeatable value for money. Pristine preamps and converters ensure that every nuance of your voice is relayed perfectly, while the high-gain headphone amplifier delivers superb sound to keep you fully adrenalised for those intense LoL tournaments. Just hit the Smartgain button to automatically optimise microphone preamp gain, and adjust input and output levels manually with the big Volume Knob.
Indeed, the EVO 4 makes for such a huge qualitative upgrade over your PC or Mac’s onboard sound system, and your gaming headset, that you’ll hear the benefits in all other audio departments, too, from Zoom calls and media consumption to video editing and music production.
Microphone
With the camera, lighting and audio interface sorted, the last piece in the streaming hardware puzzle is the most potentially bewildering. Selecting a microphone is a subject entirely unto itself, with various types and technologies to consider, lots of jargon to negotiate and models available at a huge range of price points. However, assuming you only need a mic for the purposes of capturing your voice – as opposed to musical instruments, field recordings, etc – we’d suggest looking no further than our very own EVO SR1 Condenser Microphone, which offers a super-cardioid polar pattern, perfect for streaming and podcasting, and is designed with flattering vocal response at the very top of the agenda, making it a fine match for the EVO 4 audio interface. It also looks great on camera, making it clear to your viewers that you’re serious about your streaming, should that matter to you.
The SR1 comes as part of our Start Recording Bundle, which also includes the EVO 4 interface, EVO SR2000 headphones, EVO Shockmount and an XLR cable. The only other cost you’ll need to factor in is that of a desk stand or clamp-mounted arm for positioning the mic correctly.
Software
Once you’re fully rigged for sight and sound, it’s time to turn your attention to software, and here there’s really only one choice: the fabulously free and open source Open Broadcaster Software, or OBS. In a nutshell, OBS pulls together all the signals involved in your stream – camera, game video and audio, and microphone – for broadcast to a range of services including Twitch and YouTube Gaming, and with a huge amount of control given over their configuration, mixing and presentation. It’s not the most immediately intuitive of interfaces, but there are plenty of walkthroughs and guides available online to get you started.
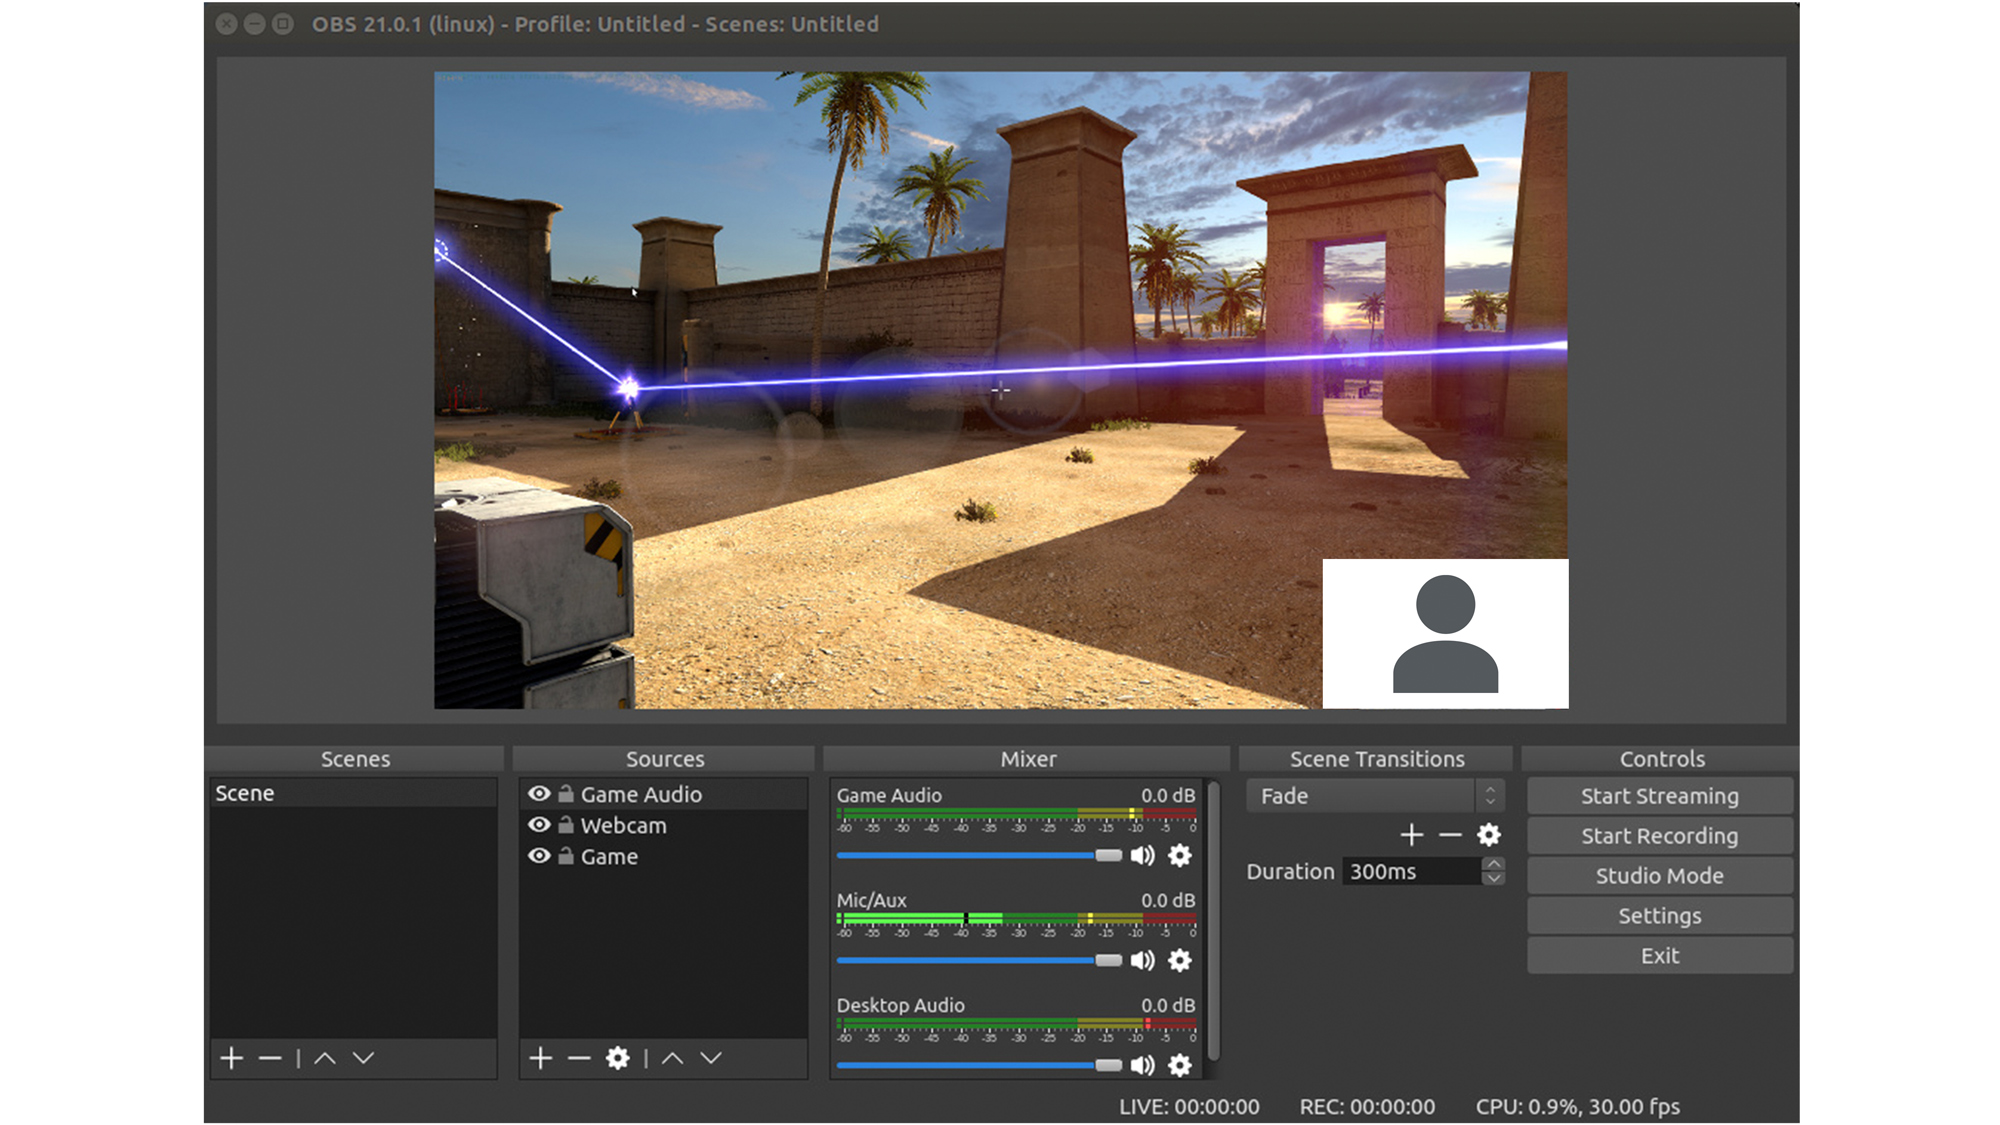
Importantly, OBS’ extensive feature list includes support for VST plugins – virtual equivalents to (and, in many cases, direct emulations of) studio hardware effects processors, called on to transform and improve audio signals within the application. The most pertinent effects for game streaming are compression and EQ (equalisation), which can be used to imbue your voiceover with that dynamically consistent, up-front ‘radio’ sound. As well as those built into OBS itself, there are countless excellent free plugin compressors and EQs to be found online, although you will need to bone up on their controls and functions before you even think about bringing them to bear, as applying them without understanding how they work can easily do more harm than good.
Related Articles

Live streaming video games has become big business over the last few years, with the pseudo-celebrity likes of PewDiePie and Ninja attracting millions of followers to their Twitch channels and raking in serious bucks as a result. Ironically, although finding that level of success is obviously the exception rather than the rule, the one thing that absolutely won’t be a hindrance to any aspiring Tfue or xQc is the gear required to set up a streaming rig on par with those of the top tier. Yes, as with most things in contemporary digital media, the barrier to entry for game streaming is surprisingly low, and in this guide, we’ll tell you exactly what you need to get up and running.
Written by EVO
Live streaming video games has become big business over the last few years, with the pseudo-celebrity likes of PewDiePie and Ninja attracting millions of followers to their Twitch channels and raking in serious bucks as a result. Ironically, although finding that level of success is obviously the exception rather than the rule, the one thing that absolutely won’t be a hindrance to any aspiring Tfue or xQc is the gear required to set up a streaming rig on par with those of the top tier. Yes, as with most things in contemporary digital media, the barrier to entry for game streaming is surprisingly low, and in this guide, we’ll tell you exactly what you need to get up and running.
Before we start, we should make it clear that we’re only discussing PC and Mac here, as the two most popular consoles for streaming – Xbox and PlayStation 4/5 – make the process almost effortless: plug in your headset and webcam, hit the Stream button and do your thing. Streaming from PC or Mac requires a little more setup, but also gives you many more options in terms of video and audio quality.
Assuming you’re already equipped with a suitably capable PC or Mac, a decent broadband connection and a Twitch account, then, let’s start with the visuals…
Camera
While the quality of the screen capture in your stream is easily optimised, the clarity of the parallel live camera feed that puts your mug in the corner will be entirely down to the camera you choose to invest in (or the one built into your laptop if that’s what you’re happy to stick with). Thankfully, there are numerous sub-£100 1080p options on the market that will more than suffice, including the ubiquitous Logitech C922 HD Pro and Elgato Facecam. If you’re a stickler for image quality, though, doubling that budget will get you into 4K territory; and if you’re really serious and money is no object, you might want to step into the world of DSLR cameras and capture cards, which is beyond the scope of this guide.
Lighting
While you can certainly get away with a carefully positioned desk lamp for basic scene illumination, dropping a bit of cash on some dedicated lighting – the Elgato Key Light, Lume Cube Broadcast Lighting Kit or just about any budget softbox kit, to name a few – will make a massive difference to your perceived production values.
Audio interface
One of the technical elements that separates a good stream from a great one is the method by which the streamer captures their own voice. Don’t get us wrong, an integrated headset mic will sound fine – but a pro-quality microphone plugged into a pro-quality audio interface will make for a night-and-day improvement over that most rudimentary solution.
The EVO 4 interface is ideal for game streaming, and represents truly unbeatable value for money. Pristine preamps and converters ensure that every nuance of your voice is relayed perfectly, while the high-gain headphone amplifier delivers superb sound to keep you fully adrenalised for those intense LoL tournaments. Just hit the Smartgain button to automatically optimise microphone preamp gain, and adjust input and output levels manually with the big Volume Knob.
Indeed, the EVO 4 makes for such a huge qualitative upgrade over your PC or Mac’s onboard sound system, and your gaming headset, that you’ll hear the benefits in all other audio departments, too, from Zoom calls and media consumption to video editing and music production.
Microphone
With the camera, lighting and audio interface sorted, the last piece in the streaming hardware puzzle is the most potentially bewildering. Selecting a microphone is a subject entirely unto itself, with various types and technologies to consider, lots of jargon to negotiate and models available at a huge range of price points. However, assuming you only need a mic for the purposes of capturing your voice – as opposed to musical instruments, field recordings, etc – we’d suggest looking no further than our very own EVO SR1 Condenser Microphone, which offers a super-cardioid polar pattern, perfect for streaming and podcasting, and is designed with flattering vocal response at the very top of the agenda, making it a fine match for the EVO 4 audio interface. It also looks great on camera, making it clear to your viewers that you’re serious about your streaming, should that matter to you.
The SR1 comes as part of our Start Recording Bundle, which also includes the EVO 4 interface, EVO SR2000 headphones, EVO Shockmount and an XLR cable. The only other cost you’ll need to factor in is that of a desk stand or clamp-mounted arm for positioning the mic correctly.
Software
Once you’re fully rigged for sight and sound, it’s time to turn your attention to software, and here there’s really only one choice: the fabulously free and open source Open Broadcaster Software, or OBS. In a nutshell, OBS pulls together all the signals involved in your stream – camera, game video and audio, and microphone – for broadcast to a range of services including Twitch and YouTube Gaming, and with a huge amount of control given over their configuration, mixing and presentation. It’s not the most immediately intuitive of interfaces, but there are plenty of walkthroughs and guides available online to get you started.
Importantly, OBS’ extensive feature list includes support for VST plugins – virtual equivalents to (and, in many cases, direct emulations of) studio hardware effects processors, called on to transform and improve audio signals within the application. The most pertinent effects for game streaming are compression and EQ (equalisation), which can be used to imbue your voiceover with that dynamically consistent, up-front ‘radio’ sound. As well as those built into OBS itself, there are countless excellent free plugin compressors and EQs to be found online, although you will need to bone up on their controls and functions before you even think about bringing them to bear, as applying them without understanding how they work can easily do more harm than good.
Related Articles