Yes, there are thousands of samples online that you can use to build your beats and your music.
Yes, many of them are of great quality, and it’s great to make music with them. But when it comes to giving your music an organic and unique feel, using field recordings and so-called “found sounds” can be both an amusing experience and a thrilling way to practice synthesis.
With this short article, I am proposing you to follow me while I generate a simple beat and a bassline using only recordings made of household items, Ableton Live and a bunch of plugins (really, you can use any DAW or any plugin to do that).

Written by Adrien Perinot
Adrien is a blogger at ProjetHomeStudio.fr, a French website dedicated to recording and mixing in a home studio context. He is also a music producer, working with diverse musical genres such as electronic ambient music or extreme metal, with a strong interest for experimental sounds.
Gathering the instruments
Even though I often work by directly picking sounds from my library when I need them, I think it is a good practice to slow down and decide first on what kind of sound source you want to use.
For instance, if you’re willing to make a hi-hat from field recording, you’re probably not going to choose a recording with a clear pitch.
Conversely, if you want to make a pad or a bass instrument, you’re probably going to select a sample with a stable pitch, which can be easily transposed.
For the sake of this article, I decided to gather first all my tools, which are represented on the picture below :
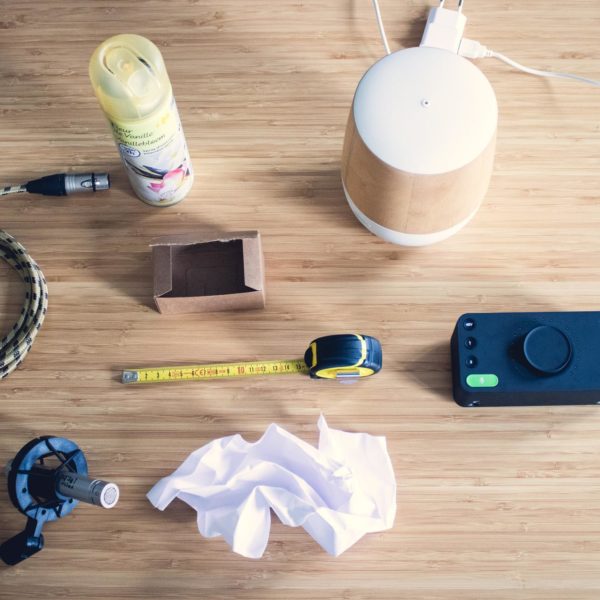
As you can see, there is definitely nothing fancy:
– Some pieces of cardboard ;
– Some paper sheets ;
– An oil diffuser (yes, it emits a sound when active) ;
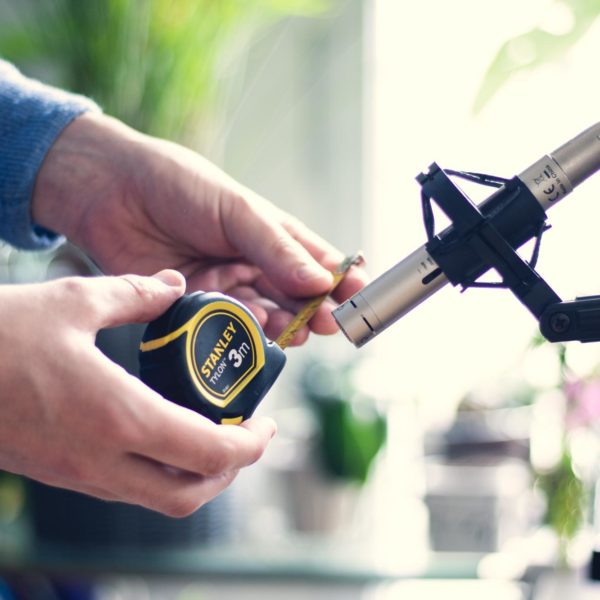
– A measuring tape ;
– A spray can ;
– A cheap 50 bucks small diaphragm microphone (honestly, it works perfect for our little project) ;
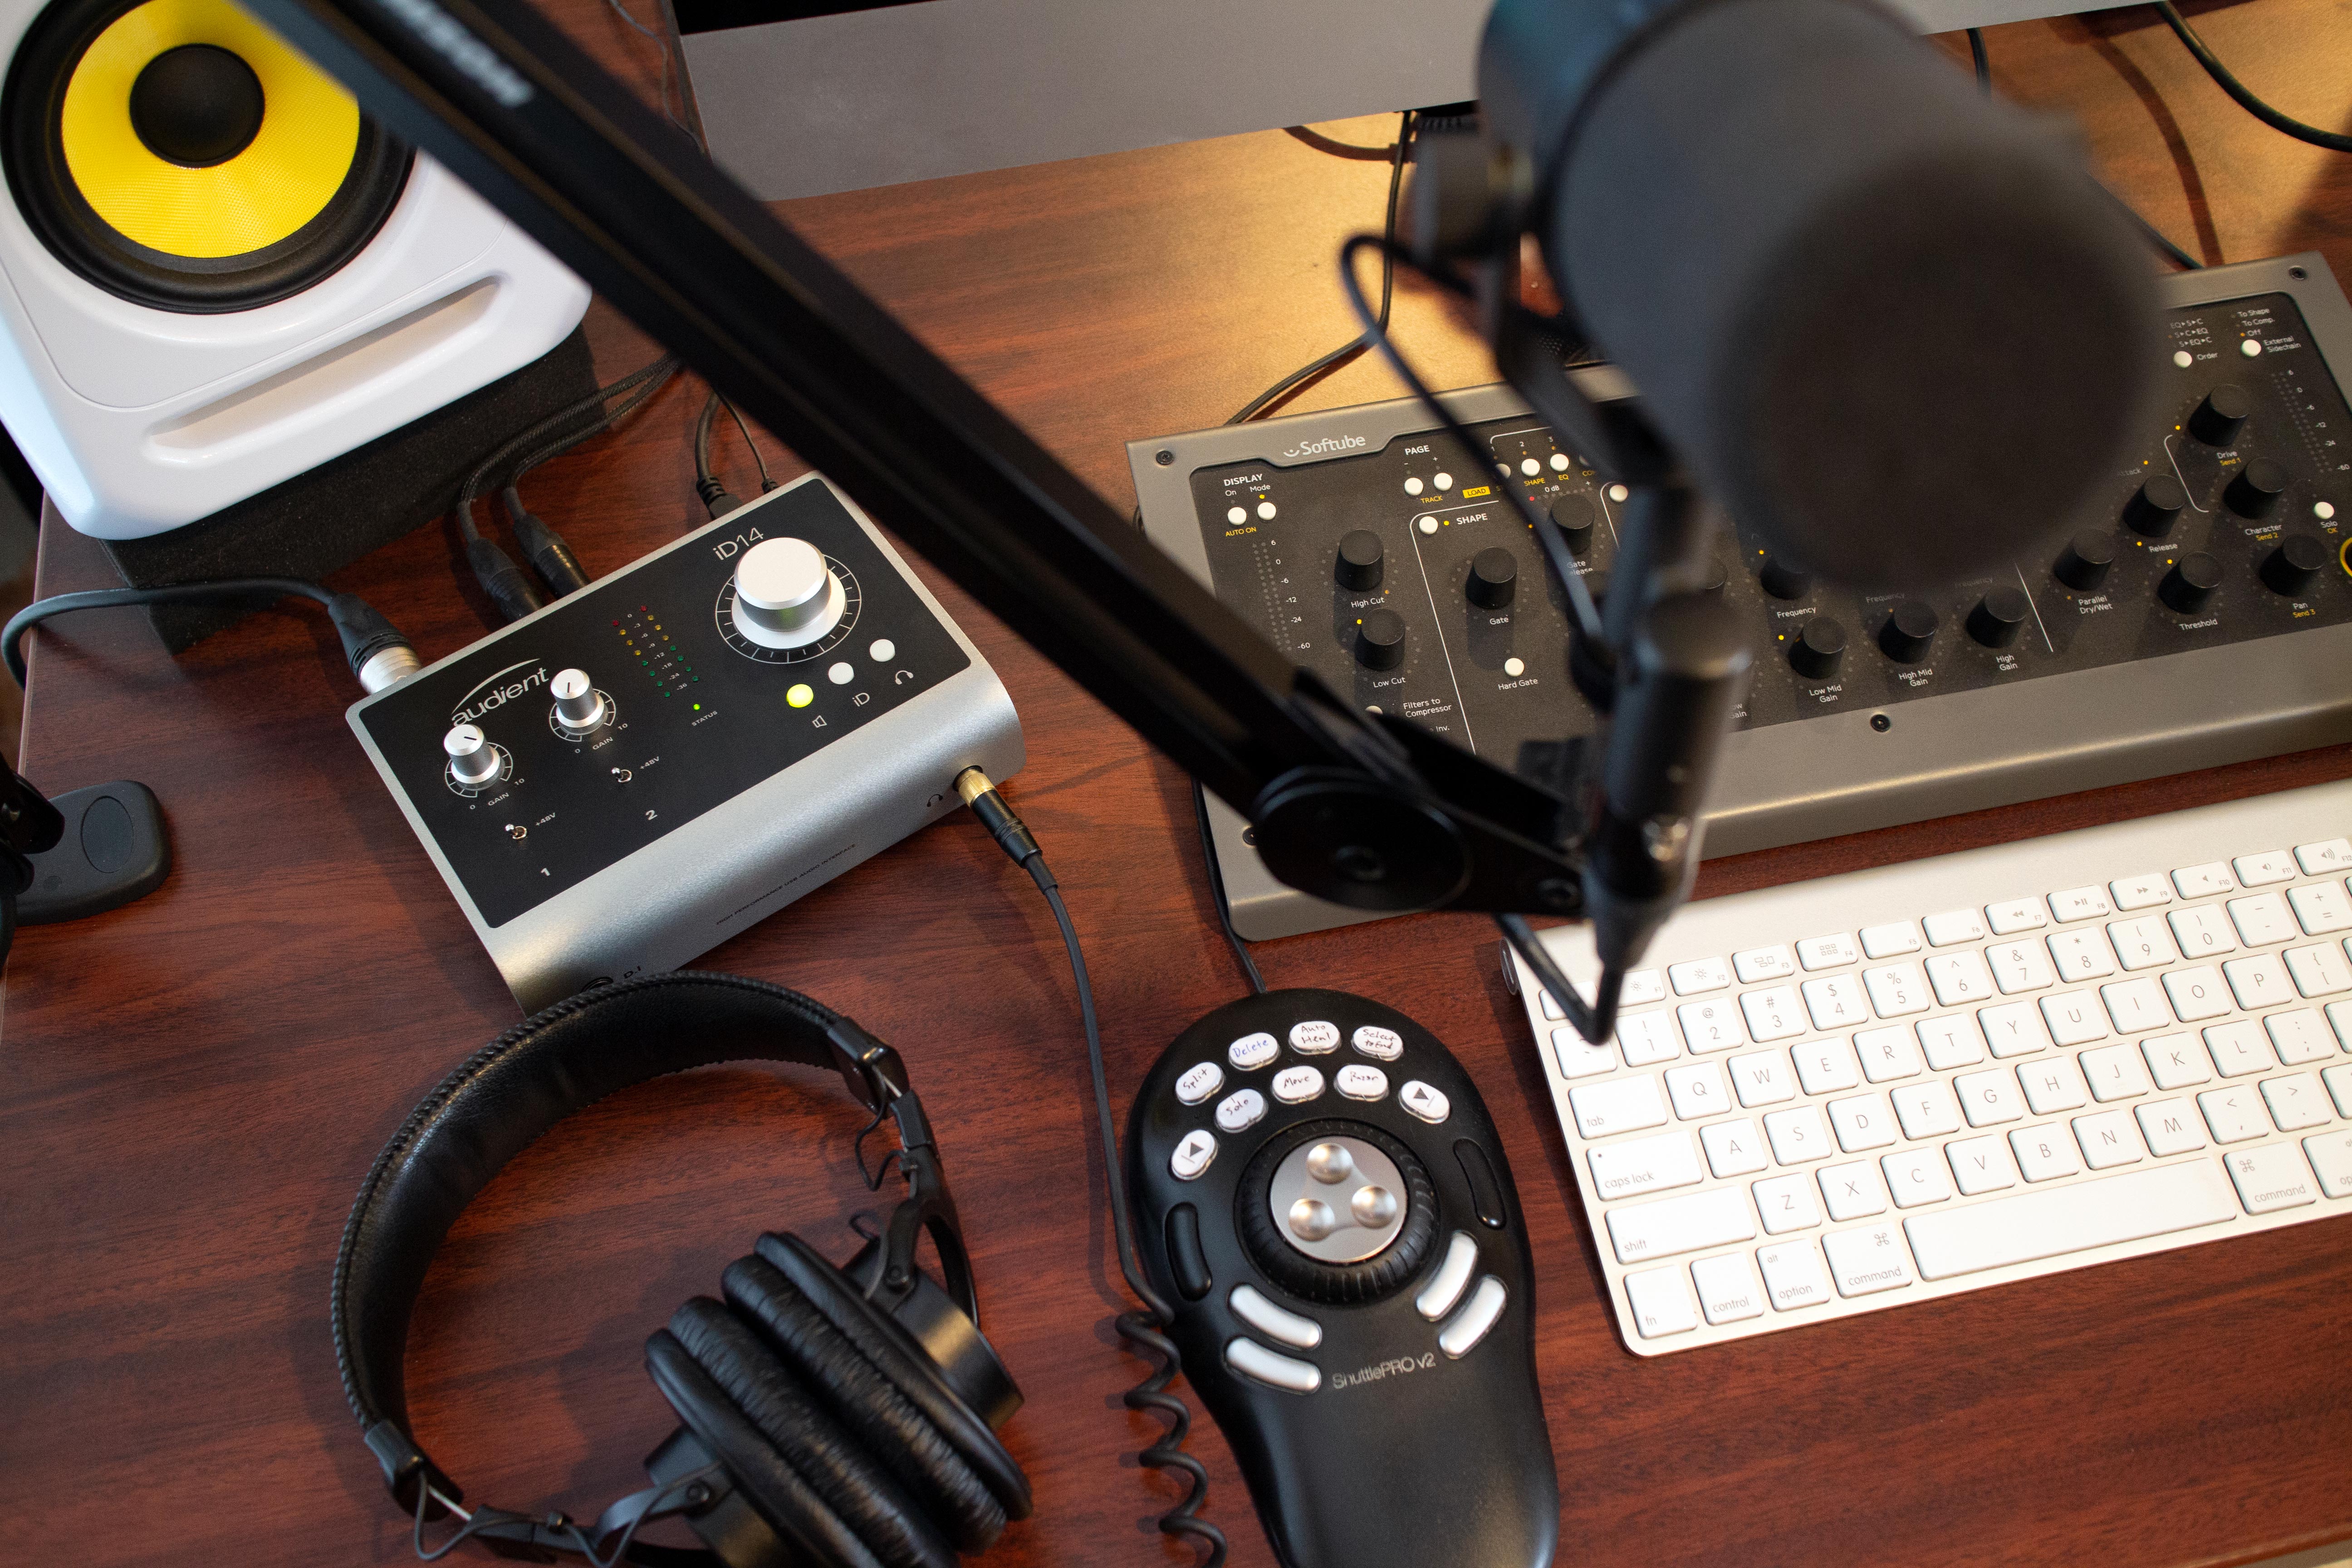
– And last but not least, an audio interface. Here I am using the EVO 4 by Audient.
Now that we’re all set, we can start by building our kick drum sound.
Creating a kick drum sound from cardboard
For the kick drum, it’s a good idea to start with something that has a good amount of bass content as well as some kind of snappiness.
You want a precise sound.
In our case, it’s something that we can get by playing with our cardboard pieces.
Paper and cardboard can generate a lot of different sounds depending on how they’re manipulated, but when you rub one piece of cardboard against another one, you can get some snappy sounds like this :
So I extracted one of those “cardboard hits” and processed it like this :
– I pitched it down two full octaves to get a much deeper sound ;
– I played with the envelope to control the release of the kick ;
– I added a pitch envelope in order to have a higher pitch on the first few milliseconds (for a more clicky sound, in this case) ;
– I filtered out the top end.
Then I sculpted the signal with an EQ in order to bring out the bass more and reduce the impact of the mid range, and eventually added some tape saturation :
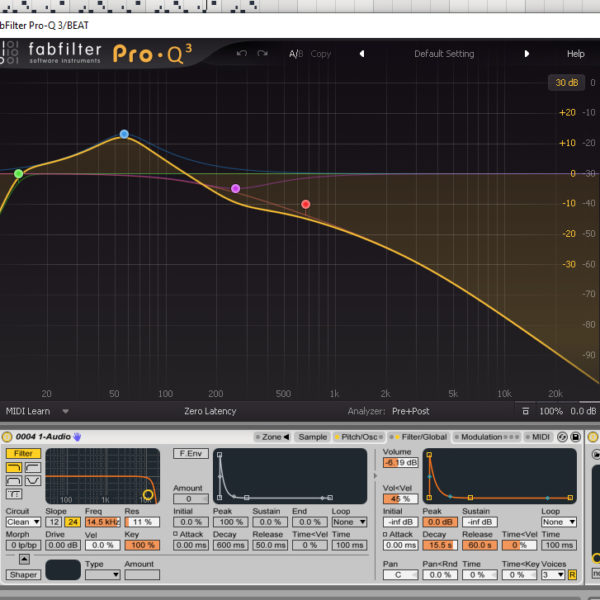
Which brought me to this sound :
Not bad right ?
But it was only the beginning, because it now felt like it’s lacking a hihat track.
Adding a paper hihat
When working with analog synths, creating a hihat sound from filtered noise is a common technique.
In this spirit, I usually create my hihats from samples that have a noisy component.
So I recorded some paper being crumpled.

Sounds like this :
I took a large piece of this sample, loaded it in Sampler (Live’s sample manipulation plugin), filtered out the low end below 280 Hz and added an aggressive envelope with no sustain and a very short (70 ms) decay.
Which, when triggering the sound as sixteenth notes, gave me this :
But that wasn’t enough, because this sound didn’t have any dynamic : it did not feel lively at all.
So to bring interest to the sound, I did a few things :
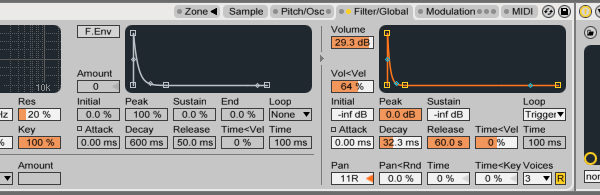
– I manually drew the velocity of each note ;
– I linked the velocity to both the volume of the sample and the envelope ;
– I added a random modulator so that each time the note is played, it plays a different part of the raw sample.
Which gave me this result (with the kick) :
Spraying the snare sound on the mix
For the snare, I decided to use the spray can I had.
Please forgive me that the sample isn’t very exciting, but the fake vanilla smell prevented me from doing too many takes…
Here is the raw sound I recorded :
I pitched down the sample a little bit, filtered out the high end and of course added an envelope similar to the hihat one, with zero sustain and a fast decay (85 ms).
This gave me an interesting sound, but which was clearly lacking the punch you would expect from a snare drum :
So I added some extra processing made of extreme EQing and fast attack limiting, with the addition of a truly-colored-but-quite-short plate reverb effect.
I won’t show the settings of the compressor (TuCo) or the reverb (Rev Plate-140) because they’re not very interesting, but the EQ curve is worth commenting :
Also pay attention to the GAIN in the DAW. Do not move the fader in the DAW to increase or decrease the volume while recording. Use the gain knob on the audio interface and increase it until you get a strong signal around -10 dB to -18dB. Try not to go hotter than this. Note, the Peak should never go above -6dB.
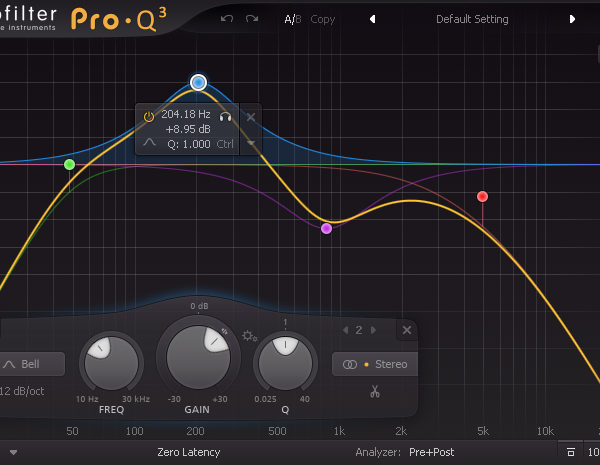
Basically, I boosted (+9 dB !) around 200 Hz to bring out some snare-like low-mids, and reduced the midrange around 850 Hz to make sure the first EQ move remained focused on a rather narrow range of frequencies.
What’s interesting to note is that the EQ curve is quite extreme. Or at least, that I was not afraid to do bold moves.
When you’re working with samples and sound design, I do think it’s a good practice not to be afraid of anything, and just experiment : sometimes, a bold EQ move can be marvellous.
Anyways, after all this EQing, limiting and reverbing — I eventually got a cool and rather unique snare sound :
Adding some clicky sounds
So I decided to add some basic deep clicks with the help of my measuring tape, which can be quite clicky when the tape is pulled slowly :
The full sound might seem like it’s not very usable because it’s noisy, but I :
– Isolated one of the little clicks ;
– Filtered out the frequencies above 480 Hz to remove the harsh clickiness ;
– Adjusted the envelope for a very fast release (32 ms).
With the help of some fast-attack limiting (and the TuCo plugin again), I managed to get a fat click sound :
Alone, it’s not very interesting, but when added to the whole mix it does contribute to the overall sound.
And if you add some subtly-mixed BBD-style delay on the whole drum buss, you end up with a nice rhythm like this :
The essential oil diffuser bassline
Last part of this little tutorial/experiment, the bassline.
Surprisingly, the world around us is full of sounds that can be used to create new instruments, whether for pads, for leads or for bass.
As long as you hear that some item generates a pitched sound, you can use it.
In my case, it was the essential oil diffuser that I’m using at home.
With the microphone very close to the body, I got this recording :
Of course, to make a full instrument out of this, you need a fair bit of processing.
The first step is to tune it. I took Live’s tuner plugin and adjusted the pitch of my sample.
I also filtered out most of the frequencies above 530 Hz, because the high end was very aggressive and after activating the glide mode to give a bit of an instrument feel to the sound, I was able to play my bassline :
But it still sounded quite bland and uninspiring.
So to replicate what I would do on a good Moog synth, I added a filter envelope to generate some interest in the first 100 to 200 milliseconds of each note.
I also added some strong transformer-like saturation (Omega TWK) and filtered again the resulting sound to remove some of the harshness it had created in the upper midrange.
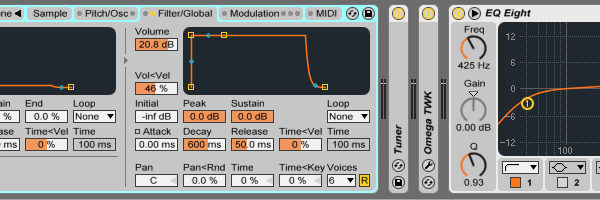
Eventually, I mixed the bassline with the beat I had created before by adding two additional effects :
– Some analog delay thanks to a send track ;
– A compressor sidechained to the kick to make sure that it remained easy to hear.
And here is the final result :
Not too bad for something made out of found sounds in an apartment, right ?
Anyways, I hope you enjoyed this little experiment and that it gave you ideas of how you could integrate field recordings in your music.
Don’t hesitate to try it yourself ! 🙂
Related Articles


Yes, there are thousands of samples online that you can use to build your beats and your music.
Yes, many of them are of great quality, and it’s great to make music with them. But when it comes to giving your music an organic and unique feel, using field recordings and so-called “found sounds” can be both an amusing experience and a thrilling way to practice synthesis.
With this short article, I am proposing you to follow me while I generate a simple beat and a bassline using only recordings made of household items, Ableton Live and a bunch of plugins (really, you can use any DAW or any plugin to do that).
Written by Adrien Perinot
Adrien is a blogger at ProjetHomeStudio.fr, a French website dedicated to recording and mixing in a home studio context. He is also a music producer, working with diverse musical genres such as electronic ambient music or extreme metal, with a strong interest for experimental sounds.
Gathering the instruments
Even though I often work by directly picking sounds from my library when I need them, I think it is a good practice to slow down and decide first on what kind of sound source you want to use.
For instance, if you’re willing to make a hi-hat from field recording, you’re probably not going to choose a recording with a clear pitch.
Conversely, if you want to make a pad or a bass instrument, you’re probably going to select a sample with a stable pitch, which can be easily transposed.
For the sake of this article, I decided to gather first all my tools, which are represented on the picture below :
As you can see, there is definitely nothing fancy:
– Some pieces of cardboard ;
– Some paper sheets ;
– An oil diffuser (yes, it emits a sound when active) ;
– A measuring tape ;
– A spray can ;
– A cheap 50 bucks small diaphragm microphone (honestly, it works perfect for our little project) ;
– And last but not least, an audio interface. Here I am using the EVO 4 by Audient.
Now that we’re all set, we can start by building our kick drum sound.
Creating a kick drum sound from cardboard
For the kick drum, it’s a good idea to start with something that has a good amount of bass content as well as some kind of snappiness.
You want a precise sound.
In our case, it’s something that we can get by playing with our cardboard pieces.
Paper and cardboard can generate a lot of different sounds depending on how they’re manipulated, but when you rub one piece of cardboard against another one, you can get some snappy sounds like this :
So I extracted one of those “cardboard hits” and processed it like this :
– I pitched it down two full octaves to get a much deeper sound ;
– I played with the envelope to control the release of the kick ;
– I added a pitch envelope in order to have a higher pitch on the first few milliseconds (for a more clicky sound, in this case) ;
– I filtered out the top end.
Then I sculpted the signal with an EQ in order to bring out the bass more and reduce the impact of the mid range, and eventually added some tape saturation :
Which brought me to this sound :
Not bad right ?
But it was only the beginning, because it now felt like it’s lacking a hihat track.
Adding a paper hihat
When working with analog synths, creating a hihat sound from filtered noise is a common technique.
In this spirit, I usually create my hihats from samples that have a noisy component.
So I recorded some paper being crumpled.
Sounds like this :
I took a large piece of this sample, loaded it in Sampler (Live’s sample manipulation plugin), filtered out the low end below 280 Hz and added an aggressive envelope with no sustain and a very short (70 ms) decay.
Which, when triggering the sound as sixteenth notes, gave me this :
But that wasn’t enough, because this sound didn’t have any dynamic : it did not feel lively at all.
So to bring interest to the sound, I did a few things :
– I manually drew the velocity of each note ;
– I linked the velocity to both the volume of the sample and the envelope ;
– I added a random modulator so that each time the note is played, it plays a different part of the raw sample.
Which gave me this result (with the kick) :
Spraying the snare sound on the mix
For the snare, I decided to use the spray can I had.
Please forgive me that the sample isn’t very exciting, but the fake vanilla smell prevented me from doing too many takes…
Here is the raw sound I recorded :
I pitched down the sample a little bit, filtered out the high end and of course added an envelope similar to the hihat one, with zero sustain and a fast decay (85 ms).
This gave me an interesting sound, but which was clearly lacking the punch you would expect from a snare drum :
So I added some extra processing made of extreme EQing and fast attack limiting, with the addition of a truly-colored-but-quite-short plate reverb effect.
I won’t show the settings of the compressor (TuCo) or the reverb (Rev Plate-140) because they’re not very interesting, but the EQ curve is worth commenting :
Also pay attention to the GAIN in the DAW. Do not move the fader in the DAW to increase or decrease the volume while recording. Use the gain knob on the audio interface and increase it until you get a strong signal around -10 dB to -18dB. Try not to go hotter than this. Note, the Peak should never go above -6dB.
Basically, I boosted (+9 dB !) around 200 Hz to bring out some snare-like low-mids, and reduced the midrange around 850 Hz to make sure the first EQ move remained focused on a rather narrow range of frequencies.
What’s interesting to note is that the EQ curve is quite extreme. Or at least, that I was not afraid to do bold moves.
When you’re working with samples and sound design, I do think it’s a good practice not to be afraid of anything, and just experiment : sometimes, a bold EQ move can be marvellous.
Anyways, after all this EQing, limiting and reverbing — I eventually got a cool and rather unique snare sound :
Adding some clicky sounds
So I decided to add some basic deep clicks with the help of my measuring tape, which can be quite clicky when the tape is pulled slowly :
The full sound might seem like it’s not very usable because it’s noisy, but I :
– Isolated one of the little clicks ;
– Filtered out the frequencies above 480 Hz to remove the harsh clickiness ;
– Adjusted the envelope for a very fast release (32 ms).
With the help of some fast-attack limiting (and the TuCo plugin again), I managed to get a fat click sound :
Alone, it’s not very interesting, but when added to the whole mix it does contribute to the overall sound.
And if you add some subtly-mixed BBD-style delay on the whole drum buss, you end up with a nice rhythm like this :
The essential oil diffuser bassline
Last part of this little tutorial/experiment, the bassline.
Surprisingly, the world around us is full of sounds that can be used to create new instruments, whether for pads, for leads or for bass.
As long as you hear that some item generates a pitched sound, you can use it.
In my case, it was the essential oil diffuser that I’m using at home.
With the microphone very close to the body, I got this recording :
Of course, to make a full instrument out of this, you need a fair bit of processing.
The first step is to tune it. I took Live’s tuner plugin and adjusted the pitch of my sample.
I also filtered out most of the frequencies above 530 Hz, because the high end was very aggressive and after activating the glide mode to give a bit of an instrument feel to the sound, I was able to play my bassline :
But it still sounded quite bland and uninspiring.
So to replicate what I would do on a good Moog synth, I added a filter envelope to generate some interest in the first 100 to 200 milliseconds of each note.
I also added some strong transformer-like saturation (Omega TWK) and filtered again the resulting sound to remove some of the harshness it had created in the upper midrange.
Eventually, I mixed the bassline with the beat I had created before by adding two additional effects :
– Some analog delay thanks to a send track ;
– A compressor sidechained to the kick to make sure that it remained easy to hear.
And here is the final result :
Not too bad for something made out of found sounds in an apartment, right ?
Anyways, I hope you enjoyed this little experiment and that it gave you ideas of how you could integrate field recordings in your music.
Don’t hesitate to try it yourself ! 🙂
Related Articles