Cody Stewart is a metal producer and drummer for electronica/metal band The Browning. Currently working in Nashville, Cody specialises in mixing and mastering metal music.
1. Get the Best Source Possible
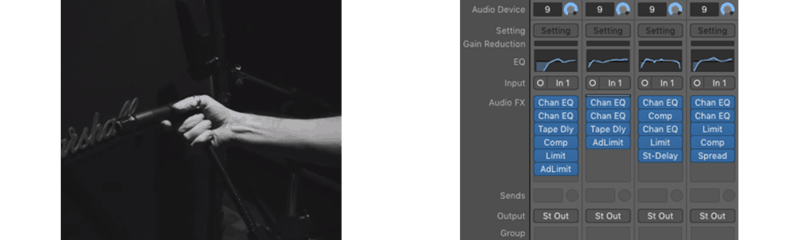
If you find yourself stacking plugins and not getting anywhere, there’s a good chance your source tone isn’t up to par. Whether it be tracking DI guitars/bass, or tracking a live drum kit/cab/vocal/etc… really work on getting that initial tone solid before jumping into plugins and tweaking.
This means using quality instruments, brand new strings, new heads, etc. The better sounding your source is, the less processing it should take.
2. Less is More
It shouldn’t take 15 plugins on your snare/guitar/bass/etc to make it sound good. With each plugin you use, it diminishes the quality of your source.
I had a bad habit of this starting out. I had the misconception that the more plugins I used and the more tweaks I made, the better it’d sound. Completely not the case.
After a while of stacking plugins and making tweaks here and there in every plugin, I found that it starts to make stuff sound weird.
So, I started backing off with using a ton of plugins and tweaks and my mixes benefited greatly from it. Great tones come from the source in my opinion. It makes more sense to polish a great sounding track than to try and polish a turd.
Getting the sound right as the source will save you a lot of time when mixing!
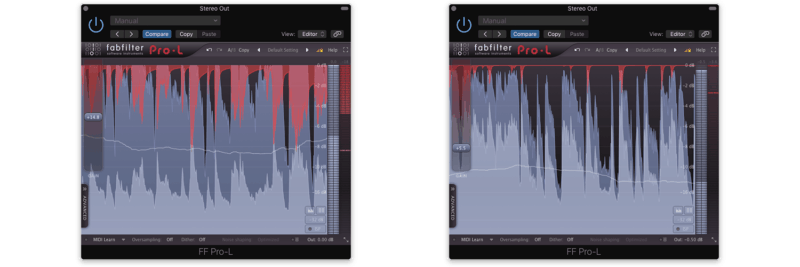
3. Sound > Volume
Having a super loud mix can be a double edged sword in most cases. You’ll have volume, but you sacrifice dynamics and transient detail, not to mention you could potentially ruin your mix.
Smashing all the life out of good mix with a limiter for volume is a common mistake. I’ve found that finding a balance between your mix and overall RMS (meaning not too loud to destroy your mix, but loud enough to hold its own against commercial mixes without squashing life out of the mix) suits me best.
I usually have my mixes peaking around -10 or -9 RMS.
Which one do you think sounds better?
4. Rhythm, Bass, and Kick Relationship
I find that in every sick mix, there’s a special relationship going on with these 3 things. I like to solo these 3 and mix them against each other. A few tricks I like that I’ve picked up from Steven Slate are as follows:
Pay attention to where your low end of your kick and bass live on an eq. (Doesn’t matter which eq, I prefer Pro Q 2 because it lets you hover over the analyzer window and freezes the image of the eq response.)
Then, make a small semi narrow cut where your bass lives, but on your kick track, normally around 70-100hz. Next, do the same for your bass track.
Make a small semi narrow cut where your kick lives, on the bass eq, normally around 50-65hz. You’ll start to hear your bass guitar and kick drum sit together nicely.
Bring in your rhythm guitars, mix them to taste on top of your bass and kick. You can even do the same trick with guitar and bass to clear up muddy frequencies.
Once you find a nice balance with those 3 things, you can build your mix around them. I find it gives a good foundation to start a mix with.
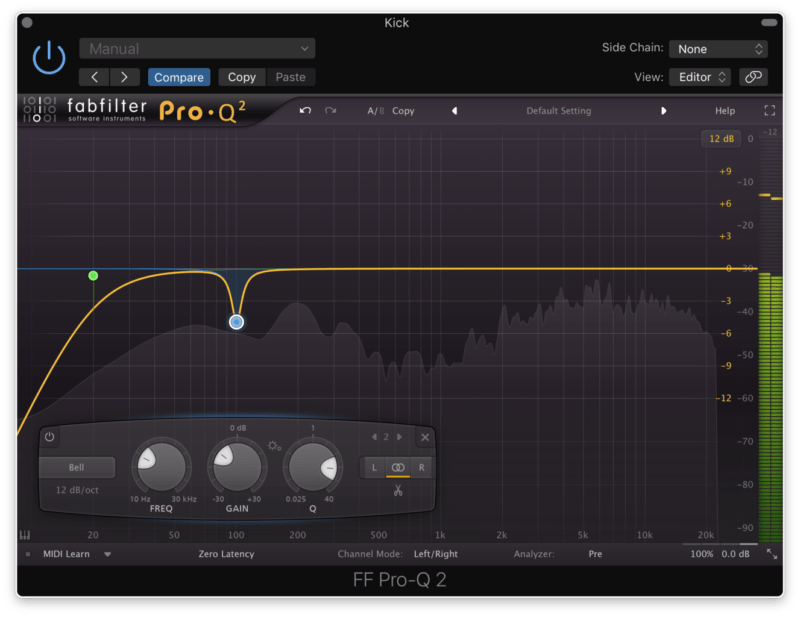
Cutting frequencies rather than boosting them often gives your mix more clarity.
5. Mastering With Multi-band Compression
For my last tip, I feel like multi-band compression is a topic that should be brought to light more. I use it on all my mixes. It’s literally my “icing on the cake”, and the last plugin before limiting on my master buss.
Multi-band compression divides the audio signal into sections or “bands”, and compresses them separately, without causing any change to the other bands.
I use this to control the low, low mid, high mid, and high ranges of a mix. For example, if my low end needs tightening up, I’ll bring down the threshold on the band I have set for low end until I’m happy with it.
If the mix has a harsh 1-3k range, I’ll bring down the threshold on that band. You have to be mindful of how much you compress. It’s very easy to make your mix sound like trash with just a couple clicks.

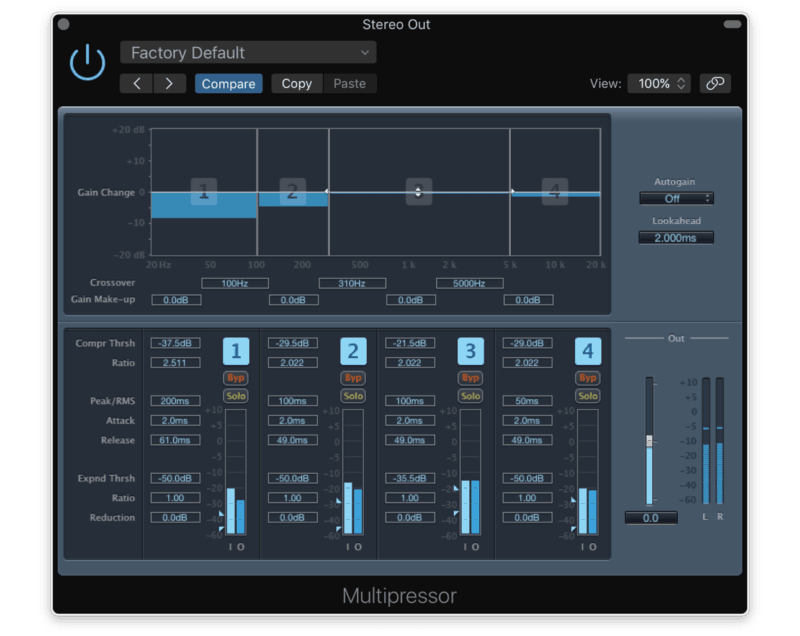
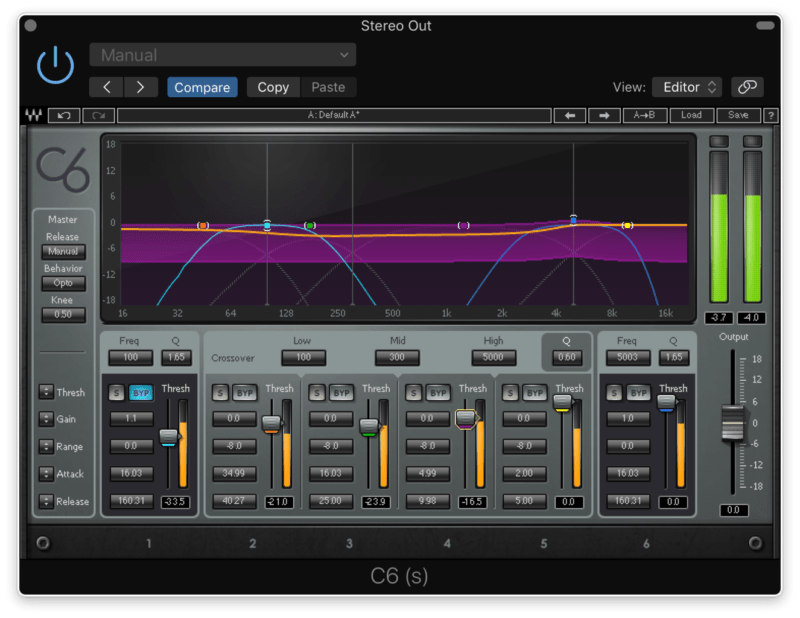
Most DAWs should have a stock Multi-Band Compressor. If not, there are always alternatives.
Also, I like to use my band pertaining to the air frequencies and boost the gain for a glossy high end on the mix, and then compress to taste so the compressor keeps the high end right where I want it, while keeping it nice and shimmery.
I hope these 5 tips help any engineer out there looking to improve at mixing metal, or just mixing in general!
Written by Cody Stewart
Related Articles


Cody Stewart, drummer for The Browning, shares his top 5 tips for metal production.
1. Get the Best Source Possible
If you find yourself stacking plugins and not getting anywhere, there’s a good chance your source tone isn’t up to par. Whether it be tracking DI guitars/bass, or tracking a live drum kit/cab/vocal/etc… really work on getting that initial tone solid before jumping into plugins and tweaking.
This means using quality instruments, brand new strings, new heads, etc. The better sounding your source is, the less processing it should take.
2. Less is More
It shouldn’t take 15 plugins on your snare/guitar/bass/etc to make it sound good. With each plugin you use, it diminishes the quality of your source.
I had a bad habit of this starting out. I had the misconception that the more plugins I used and the more tweaks I made, the better it’d sound. Completely not the case.
After a while of stacking plugins and making tweaks here and there in every plugin, I found that it starts to make stuff sound weird.
So, I started backing off with using a ton of plugins and tweaks and my mixes benefited greatly from it. Great tones come from the source in my opinion. It makes more sense to polish a great sounding track than to try and polish a turd.
Getting the sound right as the source will save you a lot of time when mixing!
3. Sound > Volume
Having a super loud mix can be a double edged sword in most cases. You’ll have volume, but you sacrifice dynamics and transient detail, not to mention you could potentially ruin your mix.
Smashing all the life out of good mix with a limiter for volume is a common mistake. I’ve found that finding a balance between your mix and overall RMS (meaning not too loud to destroy your mix, but loud enough to hold its own against commercial mixes without squashing life out of the mix) suits me best.
I usually have my mixes peaking around -10 or -9 RMS.
Which one do you think sounds better?
4. Rhythm, Bass, and Kick Relationship
I find that in every sick mix, there’s a special relationship going on with these 3 things. I like to solo these 3 and mix them against each other. A few tricks I like that I’ve picked up from Steven Slate are as follows:
Pay attention to where your low end of your kick and bass live on an eq. (Doesn’t matter which eq, I prefer Pro Q 2 because it lets you hover over the analyzer window and freezes the image of the eq response.)
Then, make a small semi narrow cut where your bass lives, but on your kick track, normally around 70-100hz. Next, do the same for your bass track.
Make a small semi narrow cut where your kick lives, on the bass eq, normally around 50-65hz. You’ll start to hear your bass guitar and kick drum sit together nicely.
Bring in your rhythm guitars, mix them to taste on top of your bass and kick. You can even do the same trick with guitar and bass to clear up muddy frequencies.
Once you find a nice balance with those 3 things, you can build your mix around them. I find it gives a good foundation to start a mix with.
Cutting frequencies rather than boosting them often gives your mix more clarity.
5. Mastering With Multi-band Compression
For my last tip, I feel like multi-band compression is a topic that should be brought to light more. I use it on all my mixes. It’s literally my “icing on the cake”, and the last plugin before limiting on my master buss.
Multi-band compression divides the audio signal into sections or “bands”, and compresses them separately, without causing any change to the other bands.
I use this to control the low, low mid, high mid, and high ranges of a mix. For example, if my low end needs tightening up, I’ll bring down the threshold on the band I have set for low end until I’m happy with it.
If the mix has a harsh 1-3k range, I’ll bring down the threshold on that band. You have to be mindful of how much you compress. It’s very easy to make your mix sound like trash with just a couple clicks.
Most DAWs should have a stock Multi-Band Compressor. If not, there are always alternatives.
Also, I like to use my band pertaining to the air frequencies and boost the gain for a glossy high end on the mix, and then compress to taste so the compressor keeps the high end right where I want it, while keeping it nice and shimmery.
I hope these 5 tips help any engineer out there looking to improve at mixing metal, or just mixing in general!
Written by Cody Stewart
Related Articles