One of the first and most important steps of recording bass for me is as simple as getting the gain levels set on your input device, such as an audio interface.

Written by Dan Veall
One of the first and most important steps of recording bass for me is as simple as getting the gain levels set on your input device, such as an audio interface.
Getting this wrong, to begin with, could put you in the difficult position of realising that when the adrenalin started pumping later in the song and you started pushing harder, ‘digging in’ with the fingers or pick, the signal began clipping. You may have been playing along with the rest of the band, you may have been recording along to a backing track in your DAW, but often clipping goes unnoticed until it’s too late.
Back in the day, recording in the all-analogue world meant we had a certain amount of leeway as pushing the levels higher gave us a nice bit of warmth and life to the sound. The distortion created by analogue devices can be quite pleasant to the ear, because of the way the waveform is clipped. Even today, older consoles and classic tape machines are still being used because of that pleasing effect. Indeed, my digital DAW is full of plug-ins that attempt to emulate that effect.
When converting analogue audio signals from your instrument into the digital world inside the computer, the process is less forgiving. The dynamic range, (which is the scale of volume between the quietest and the loudest sounds) has a solid ceiling. It is not forgiving if you push an interface or digital device into ‘digital distortion’. Not a pleasant sound! The odd clip can sometimes be repaired in a DAW, but in all honesty, if it has happened often throughout the track, it is much less trouble to just record the parts again.
Fortunately, EVO has a cool trick under its sleeve that I am going to describe how to use effectively to ensure you keep ugly noises at bay!
*It should be noted at this point that if you are using distortion pedals plugged into an amplifier and you are feeding the sound out of a line-output or you have mic’d up a speaker cabinet, this distortion sound you are creating is not the same as digital distortion. You can still send a brutally driven bass or guitar sound into your DAW via your interface, but the overall level you are sending can still be below the maximum before digital clipping occurs.
Here’s how.
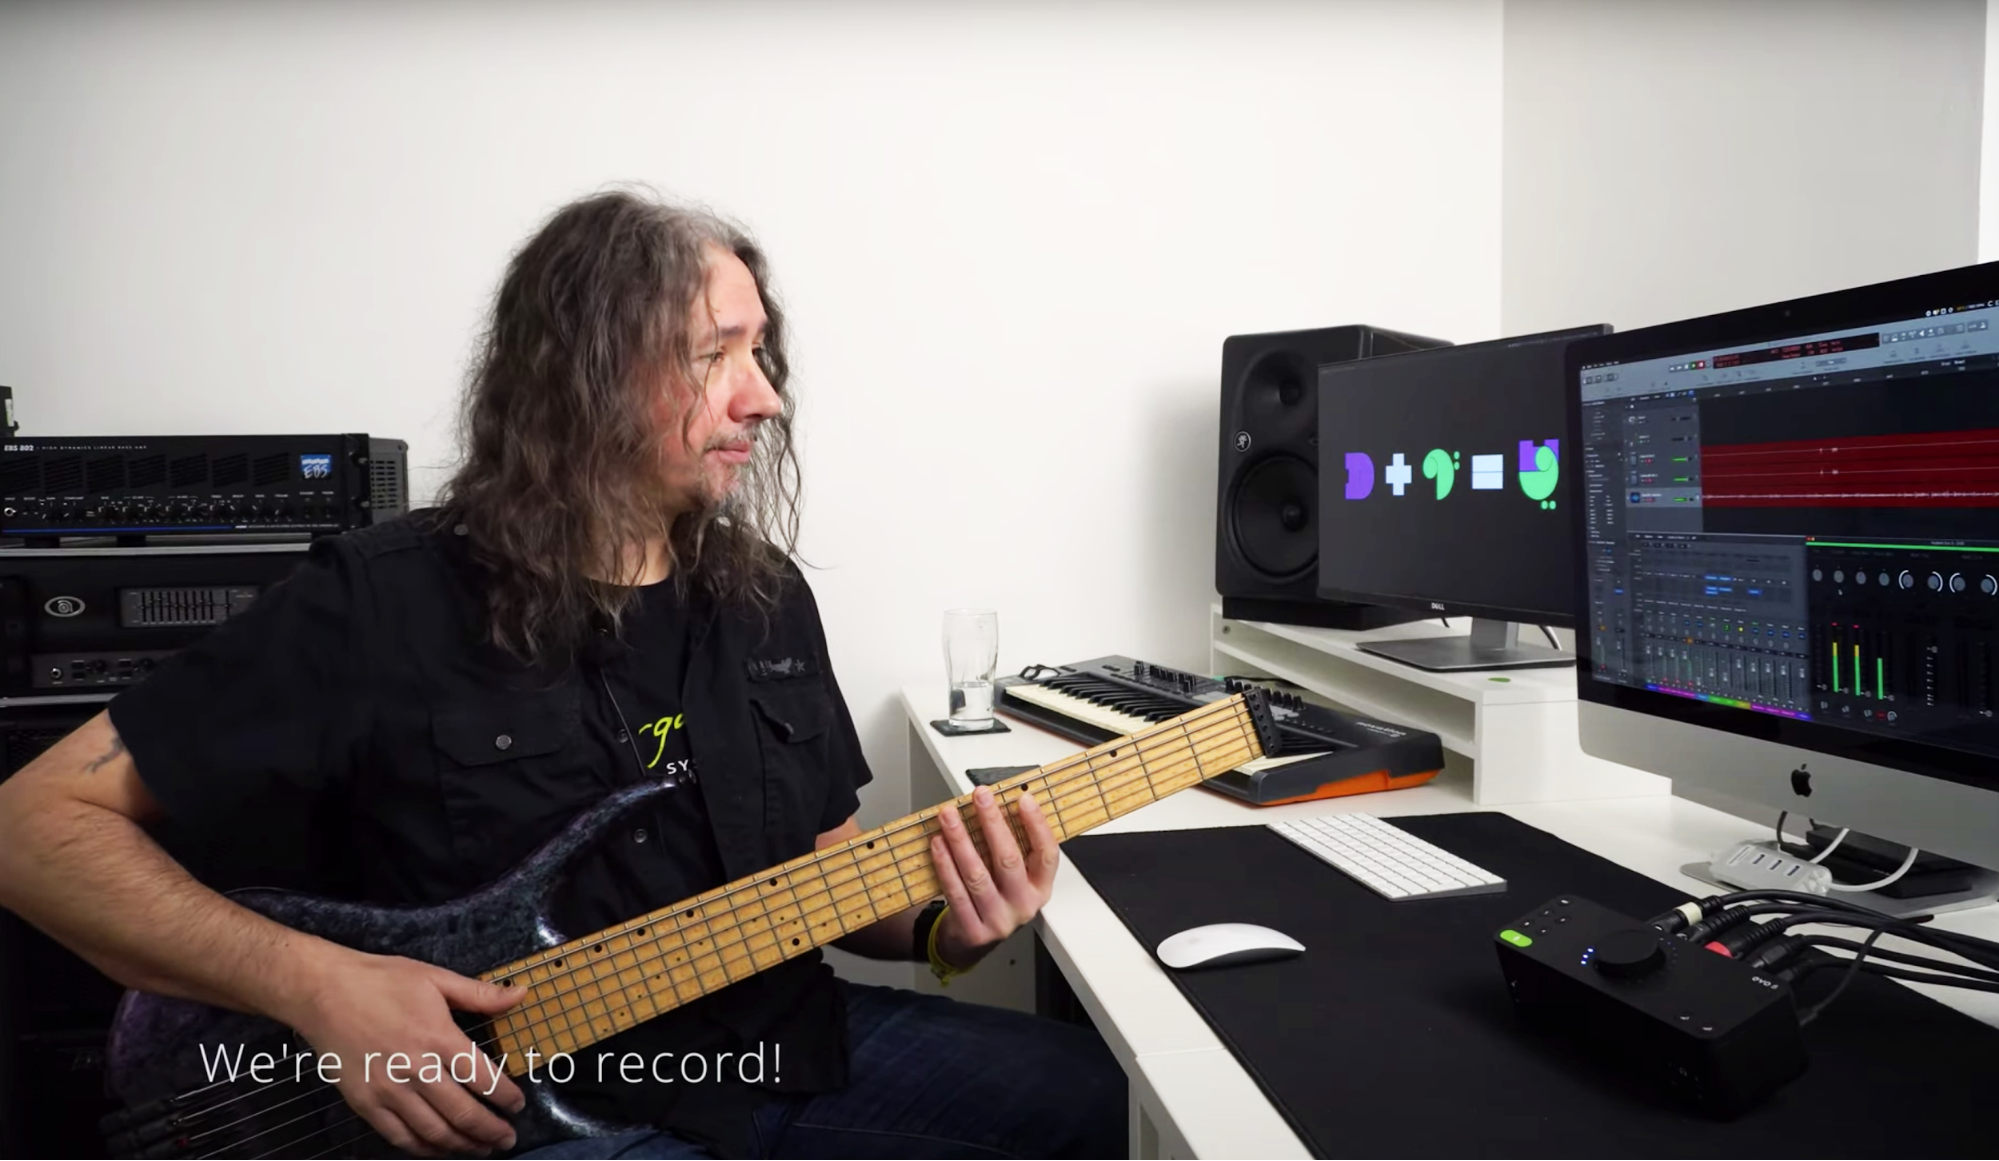
Today I am recording an electric guitar. I am taking a dry feed (using a device called a DI Box) of the sound coming out of the guitar itself. I will use this as a backup or for “re-amping” should I need to later. I have two microphones placed in front of a speaker cabinet with each microphone in specific positions around the speaker cone. This guitar sound will be recorded more than once and panned off centre, so I am using one mono ‘room mic’ placed at a distance from the cabinet to pick up some natural ambience.
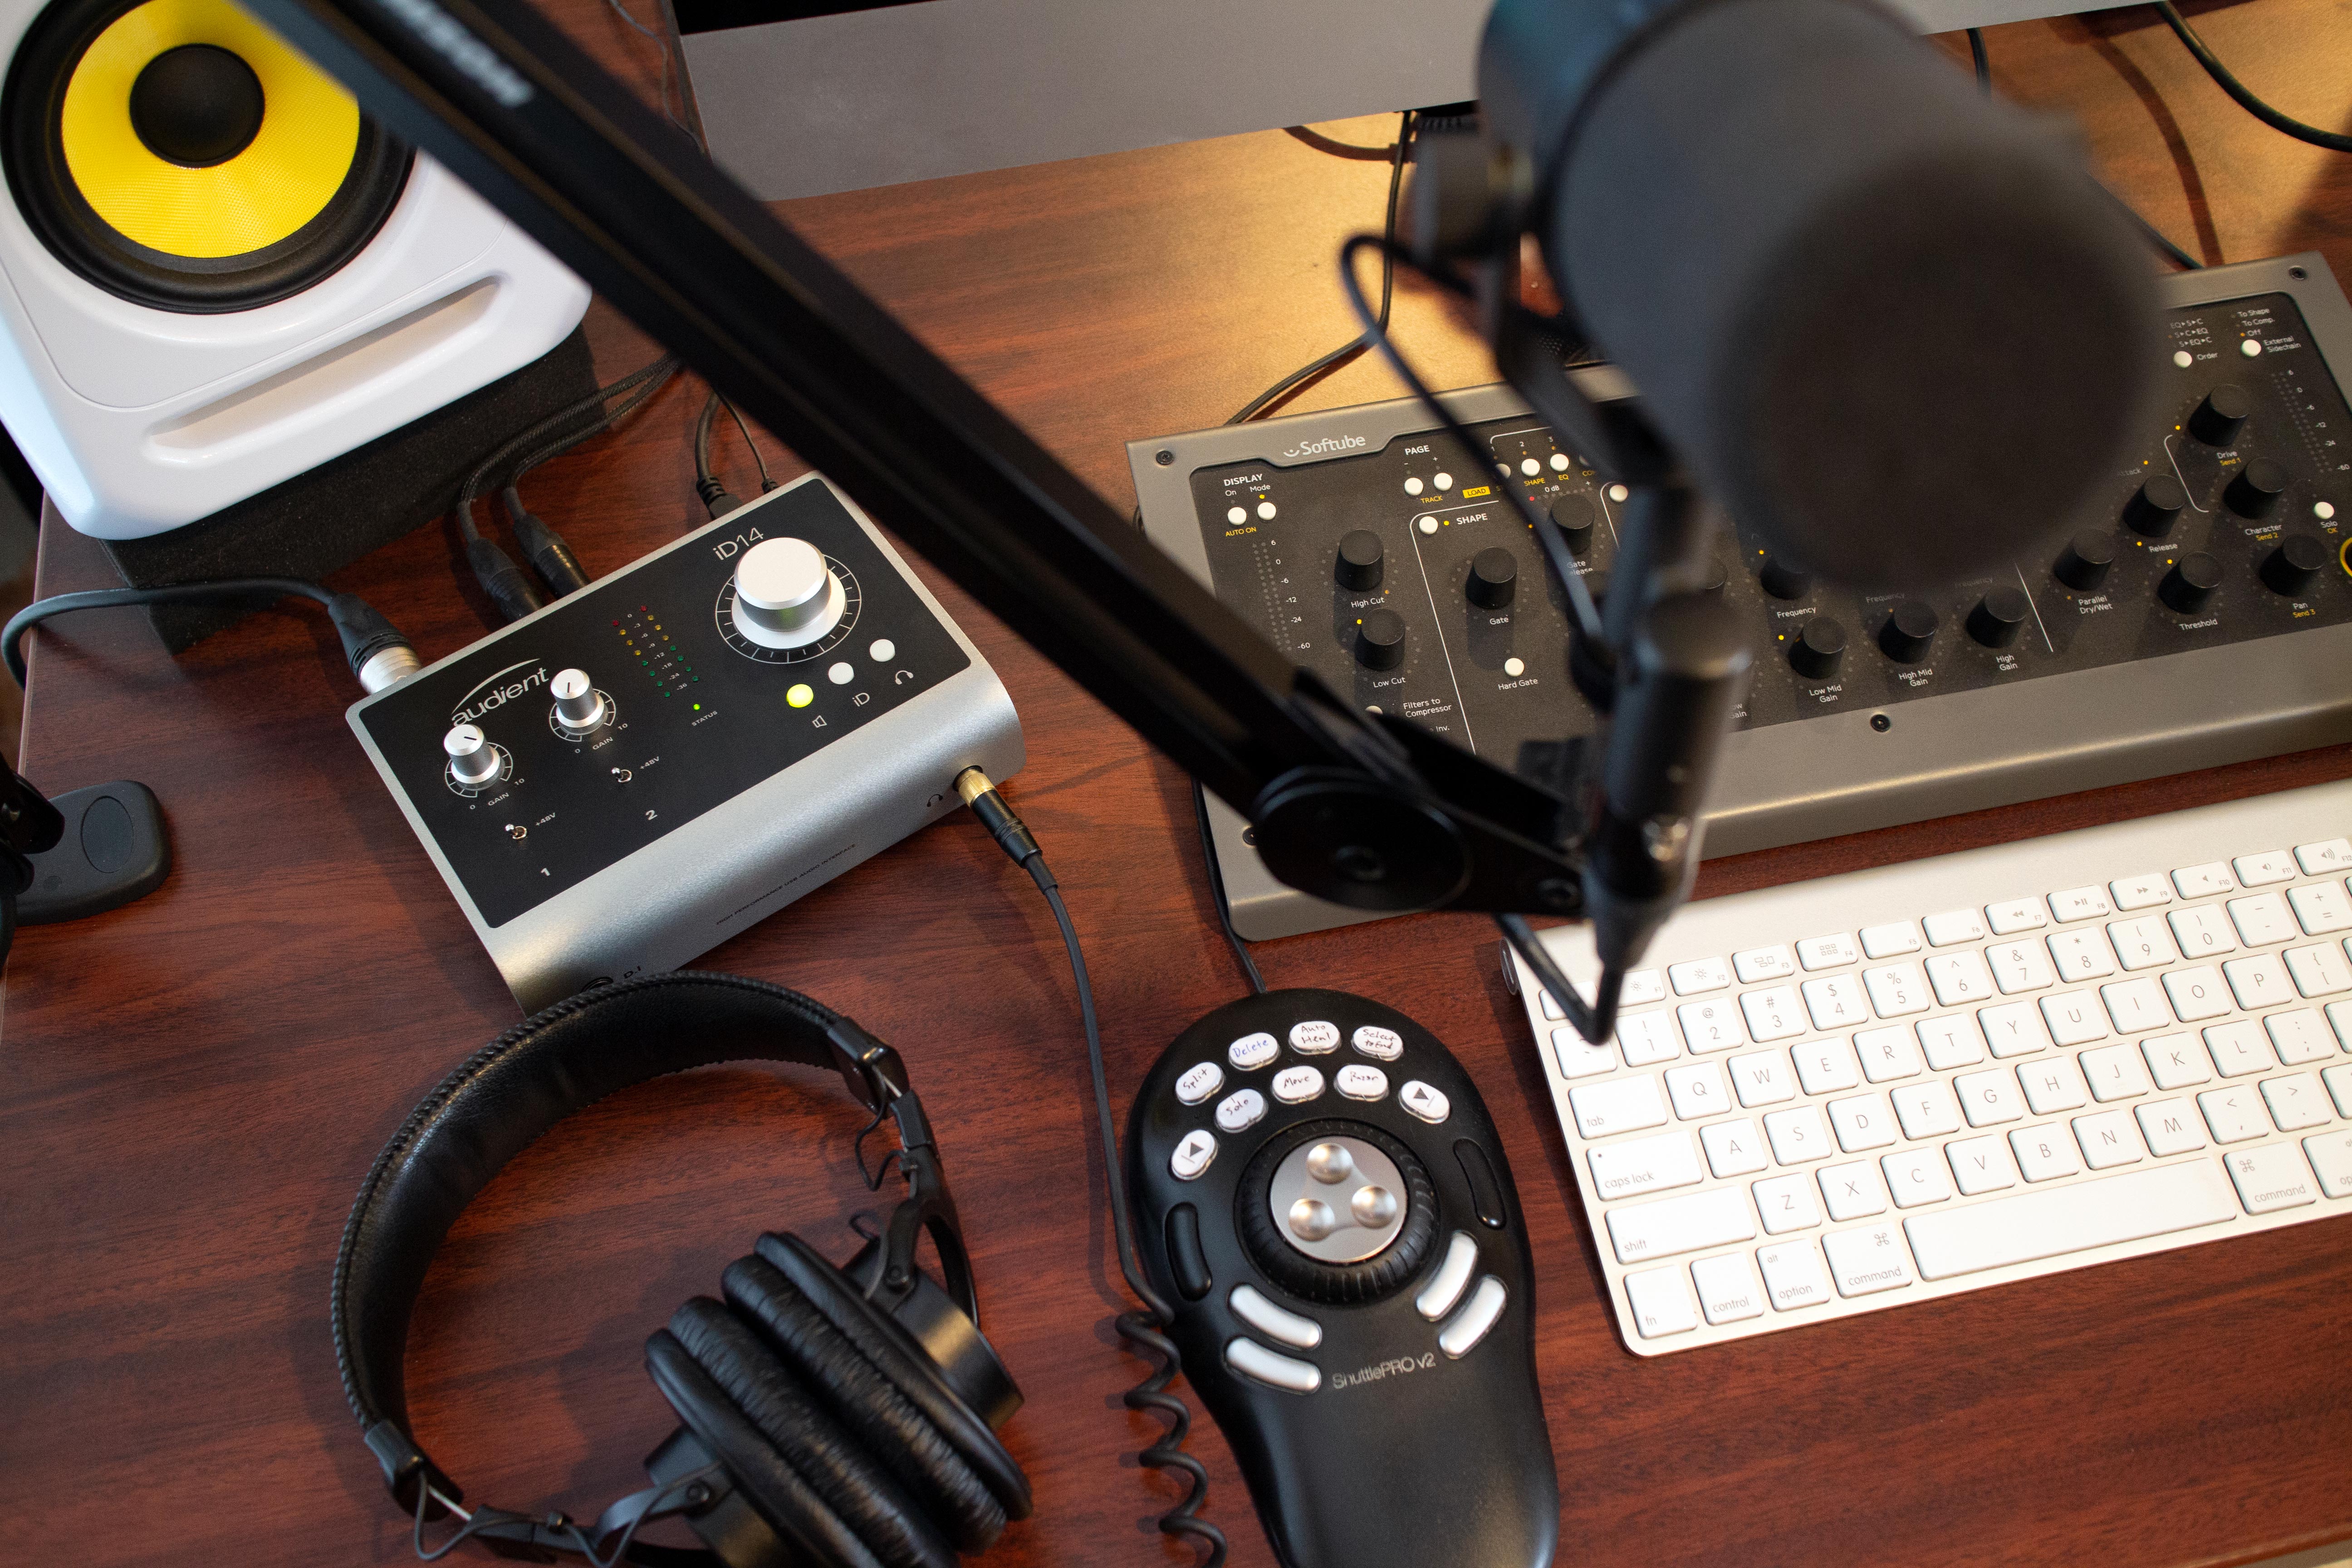
Each of the four inputs I have inserted into the channels on my Audient EVO 8.
Setting up and using SmartGain:
It’s almost too easy. First of all, I set up my gear for the loudest sound I am likely to make in my performance. This could be a moment that I switch to a drive pedal or change the channel on my amplifier. I will want to run through all options to see which is the loudest. I also want to check that when I play hard, I can see which sounds produce the most amount of level on my interface.
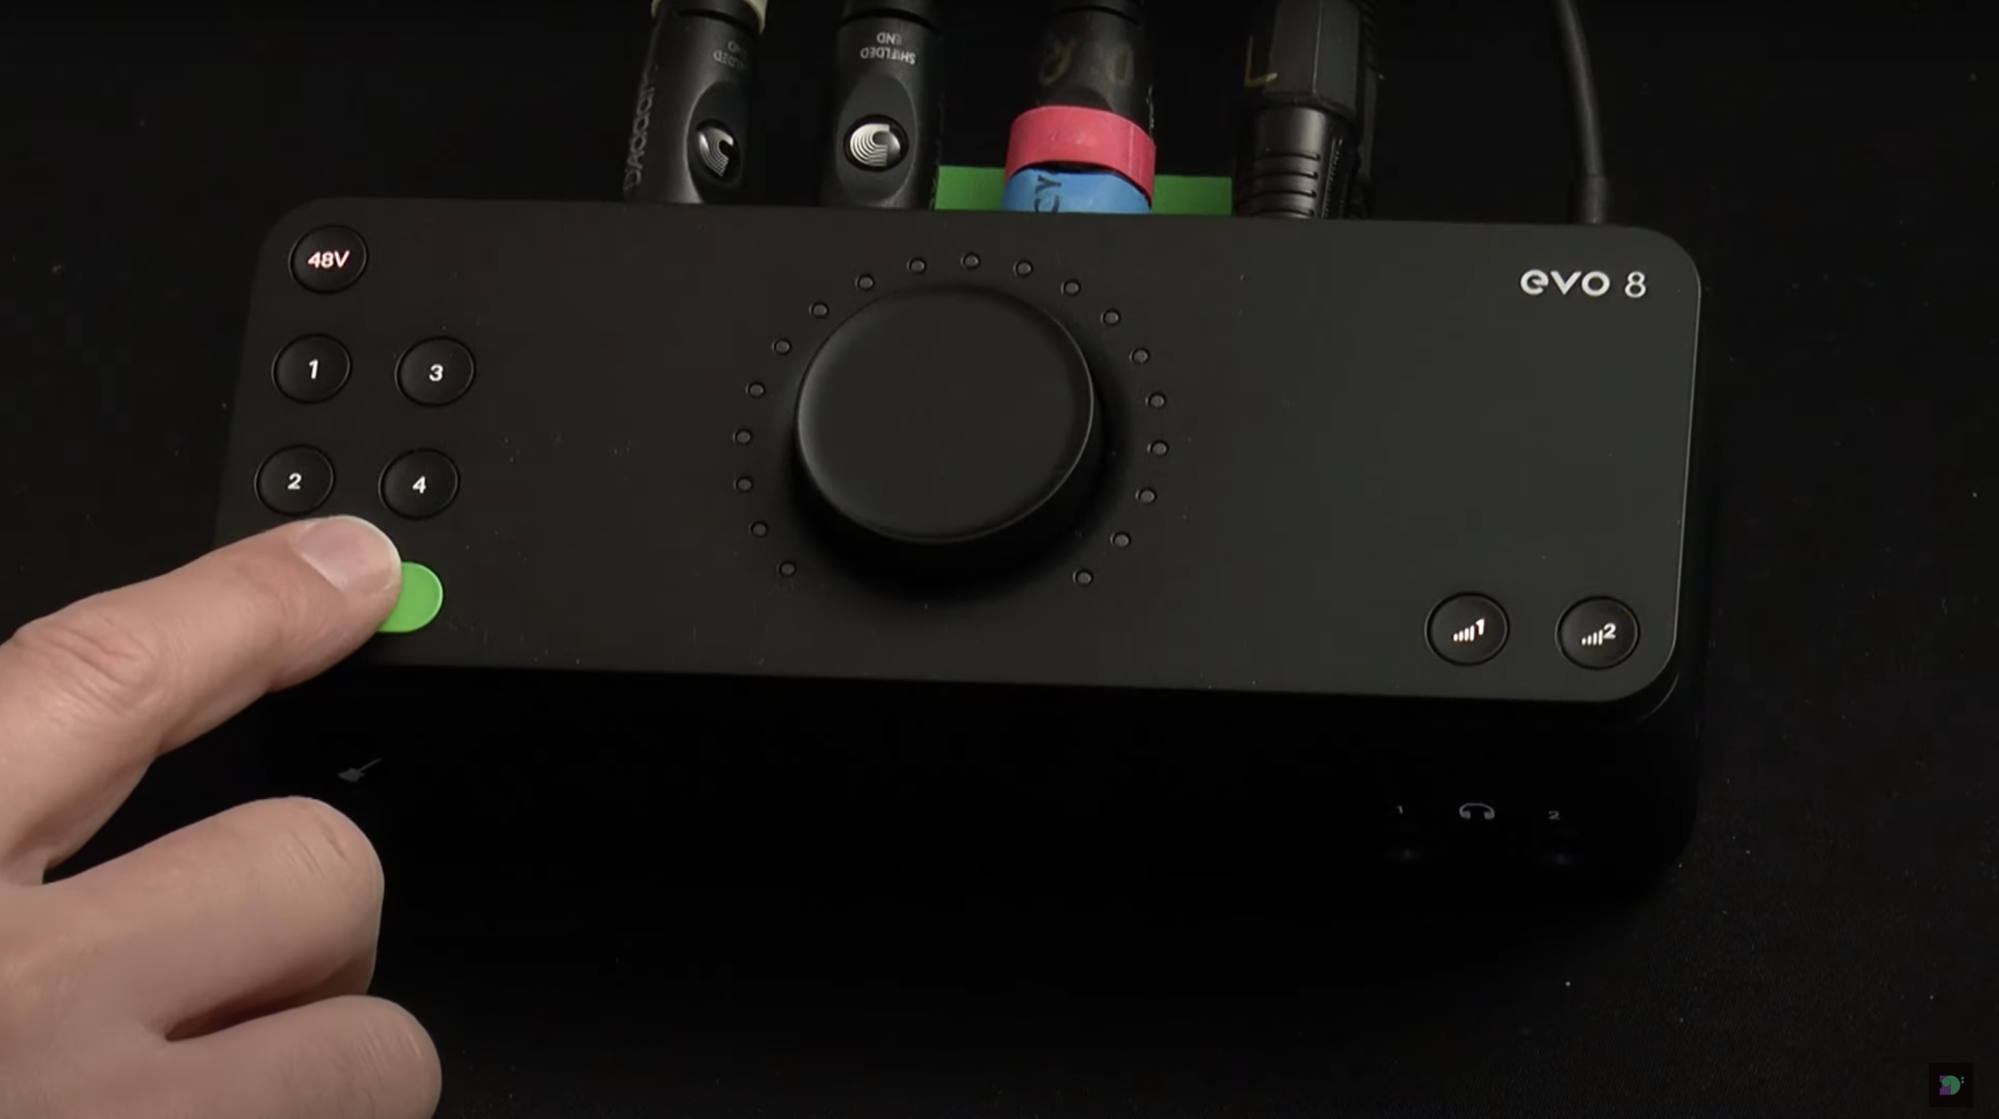
Now that I am sure all four channels are receiving a signal, I hit the green “SmartGain” button on the top of the EVO 8. I then select which channels I want EVO to “listen” to. I select all 4 buttons one at a time until they all illuminate. The next thing to do is hit the green button again and immediately start playing as if the adrenalin of performance has already kicked in. Don’t play gently, play it the same way as you intend to record it. That’s an important tip!
After a short time, EVO will unmute your sound and it will have finished setting up your gain levels automatically – all four at the same time! If you have done this properly, all of your other settings you plan to use (that are quieter) shouldn’t peak or distort the A/D convertors in the interface.
If I am doing a recording session, I love to ensure that my settings won’t change throughout the day. Audient EVO’s Mixer application allows you to save those gain settings (as well as any other settings applied in the mixer window. Choose File>Save and give your settings a meaningful name so that you can identify the session in the future. You’ll be able to reload those same settings immediately and continue (as long as no one has adjusted amp settings elsewhere!!)

Now all you have to do is select the correct channels in your DAW to record each of those inputs separately, mix, blend and adjust!
Good luck and, most importantly, don’t be afraid to try this a few times and get a feel for what works with your system!
Dan Veall
@DanVeallBassist
Musician, Columnist, Teacher
Related Articles

One of the first and most important steps of recording bass for me is as simple as getting the gain levels set on your input device, such as an audio interface.
Written by Dan Veall
One of the first and most important steps of recording bass for me is as simple as getting the gain levels set on your input device, such as an audio interface.
Getting this wrong, to begin with, could put you in the difficult position of realising that when the adrenalin started pumping later in the song and you started pushing harder, ‘digging in’ with the fingers or pick, the signal began clipping. You may have been playing along with the rest of the band, you may have been recording along to a backing track in your DAW, but often clipping goes unnoticed until it’s too late.
Back in the day, recording in the all-analogue world meant we had a certain amount of leeway as pushing the levels higher gave us a nice bit of warmth and life to the sound. The distortion created by analogue devices can be quite pleasant to the ear, because of the way the waveform is clipped. Even today, older consoles and classic tape machines are still being used because of that pleasing effect. Indeed, my digital DAW is full of plug-ins that attempt to emulate that effect.
When converting analogue audio signals from your instrument into the digital world inside the computer, the process is less forgiving. The dynamic range, (which is the scale of volume between the quietest and the loudest sounds) has a solid ceiling. It is not forgiving if you push an interface or digital device into ‘digital distortion’. Not a pleasant sound! The odd clip can sometimes be repaired in a DAW, but in all honesty, if it has happened often throughout the track, it is much less trouble to just record the parts again.
Fortunately, EVO has a cool trick under its sleeve that I am going to describe how to use effectively to ensure you keep ugly noises at bay!
*It should be noted at this point that if you are using distortion pedals plugged into an amplifier and you are feeding the sound out of a line-output or you have mic’d up a speaker cabinet, this distortion sound you are creating is not the same as digital distortion. You can still send a brutally driven bass or guitar sound into your DAW via your interface, but the overall level you are sending can still be below the maximum before digital clipping occurs.
Here’s how.
Today I am recording an electric guitar. I am taking a dry feed (using a device called a DI Box) of the sound coming out of the guitar itself. I will use this as a backup or for “re-amping” should I need to later. I have two microphones placed in front of a speaker cabinet with each microphone in specific positions around the speaker cone. This guitar sound will be recorded more than once and panned off centre, so I am using one mono ‘room mic’ placed at a distance from the cabinet to pick up some natural ambience.
Each of the four inputs I have inserted into the channels on my Audient EVO 8.
Setting up and using SmartGain:
It’s almost too easy. First of all, I set up my gear for the loudest sound I am likely to make in my performance. This could be a moment that I switch to a drive pedal or change the channel on my amplifier. I will want to run through all options to see which is the loudest. I also want to check that when I play hard, I can see which sounds produce the most amount of level on my interface.
Now that I am sure all four channels are receiving a signal, I hit the green “SmartGain” button on the top of the EVO 8. I then select which channels I want EVO to “listen” to. I select all 4 buttons one at a time until they all illuminate. The next thing to do is hit the green button again and immediately start playing as if the adrenalin of performance has already kicked in. Don’t play gently, play it the same way as you intend to record it. That’s an important tip!
After a short time, EVO will unmute your sound and it will have finished setting up your gain levels automatically – all four at the same time! If you have done this properly, all of your other settings you plan to use (that are quieter) shouldn’t peak or distort the A/D convertors in the interface.
If I am doing a recording session, I love to ensure that my settings won’t change throughout the day. Audient EVO’s Mixer application allows you to save those gain settings (as well as any other settings applied in the mixer window. Choose File>Save and give your settings a meaningful name so that you can identify the session in the future. You’ll be able to reload those same settings immediately and continue (as long as no one has adjusted amp settings elsewhere!!)
Now all you have to do is select the correct channels in your DAW to record each of those inputs separately, mix, blend and adjust!
Good luck and, most importantly, don’t be afraid to try this a few times and get a feel for what works with your system!
Dan Veall
@DanVeallBassist
Musician, Columnist, Teacher
Related Articles